SKU: OT2043-A54 Número de artículo: AB072 EAN: 4577243565130

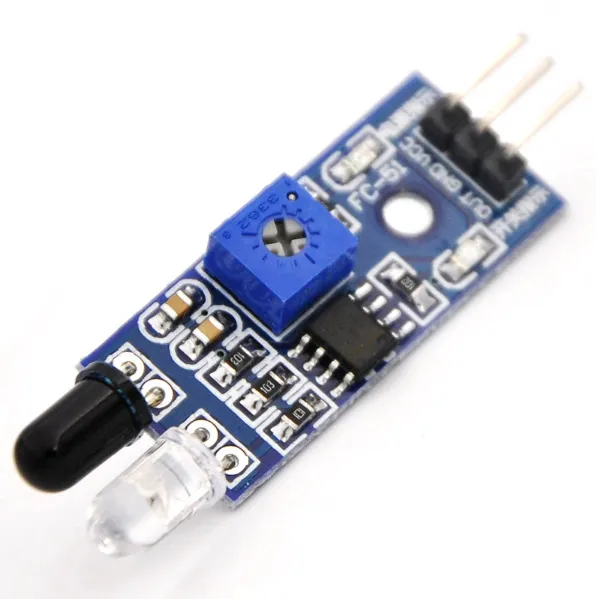
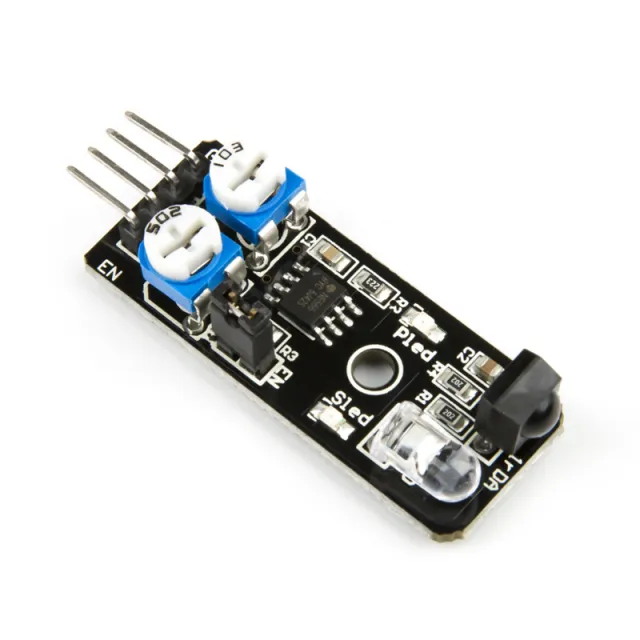
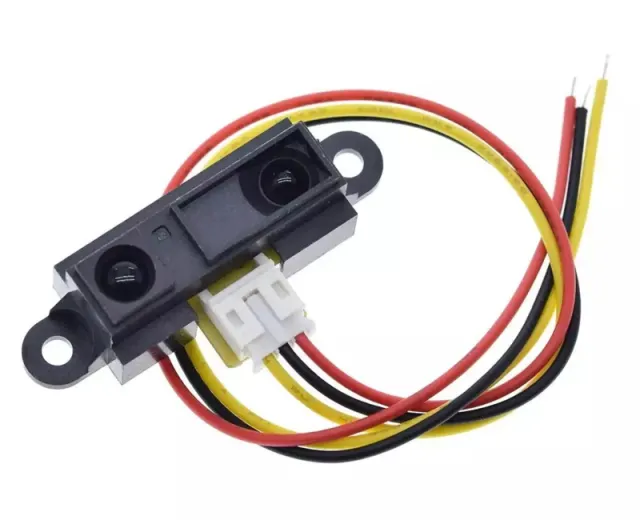
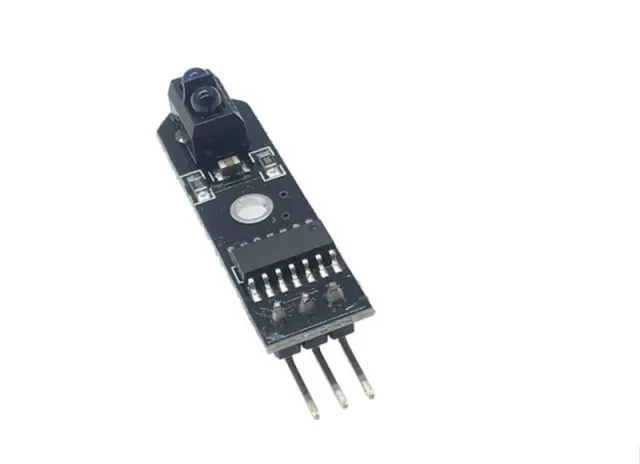
Módulo de evitación de obstáculos por infrarrojos.
Emite una señal de 5V cuando no hay obstáculos y una señal de 0V cuando hay un obstáculo, y el LED verde se enciende. La distancia se puede ajustar con un potenciómetro. Funciona con 3.3V y 5V, tiene un LED rojo de alimentación.
Detecta la distancia a obstáculos a una distancia de 2-30cm y 35 grados mediante señales infrarrojas. Incluye un emisor y un receptor infrarrojos.
Afmetingen
Longitud: 4,5cm
Anchura: 1,4cm
Altura: 0,9cm
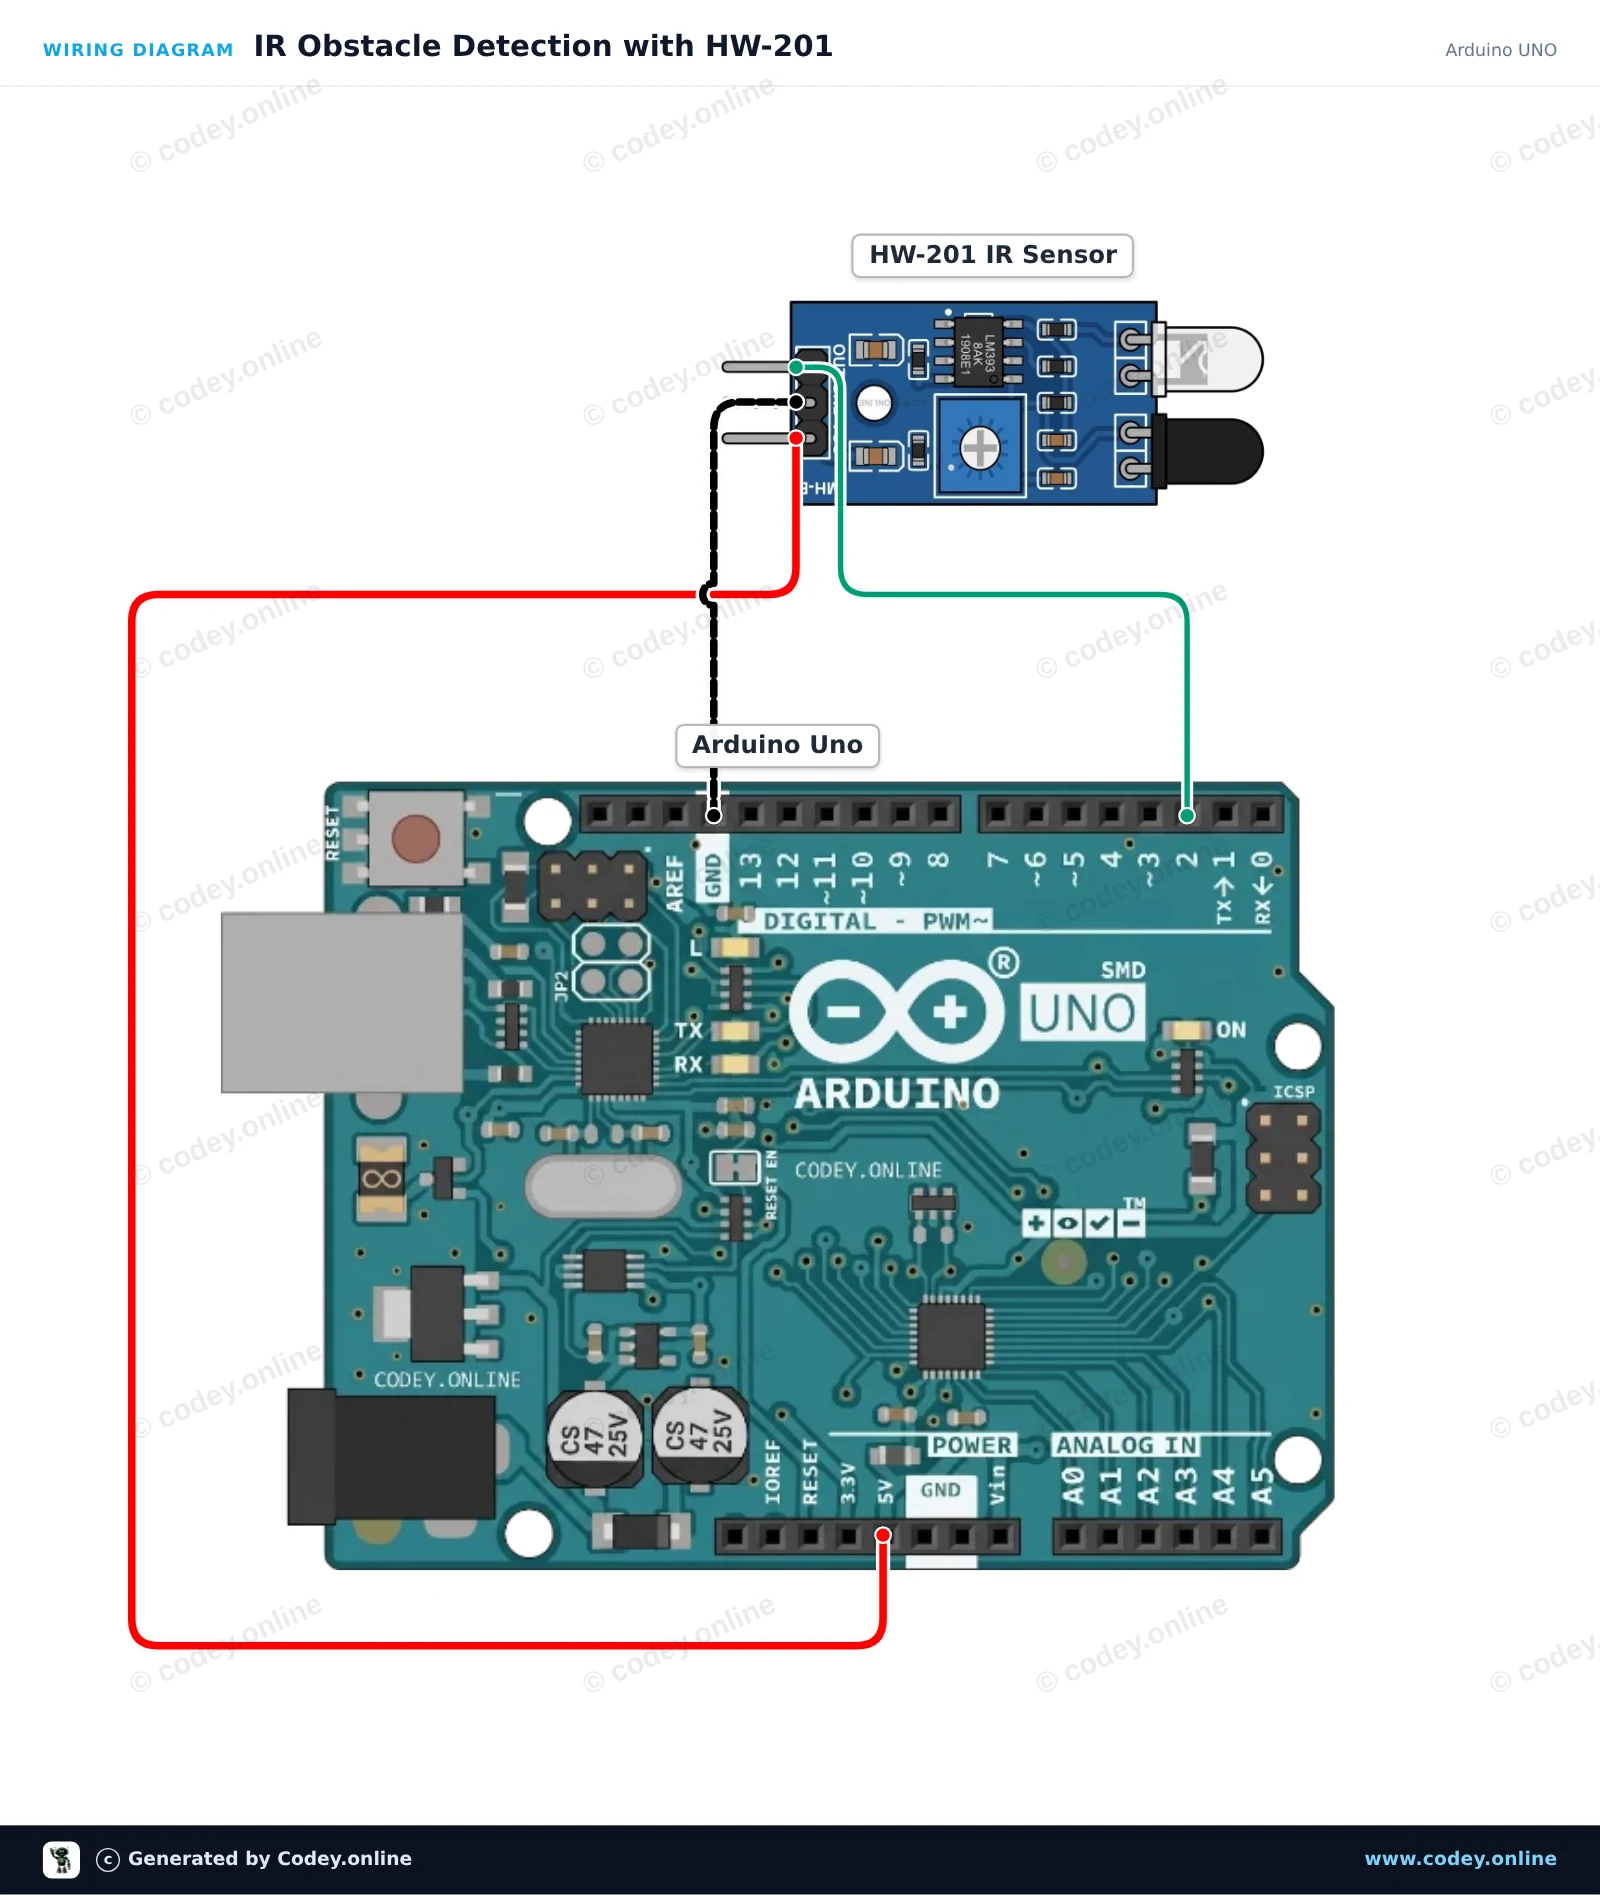
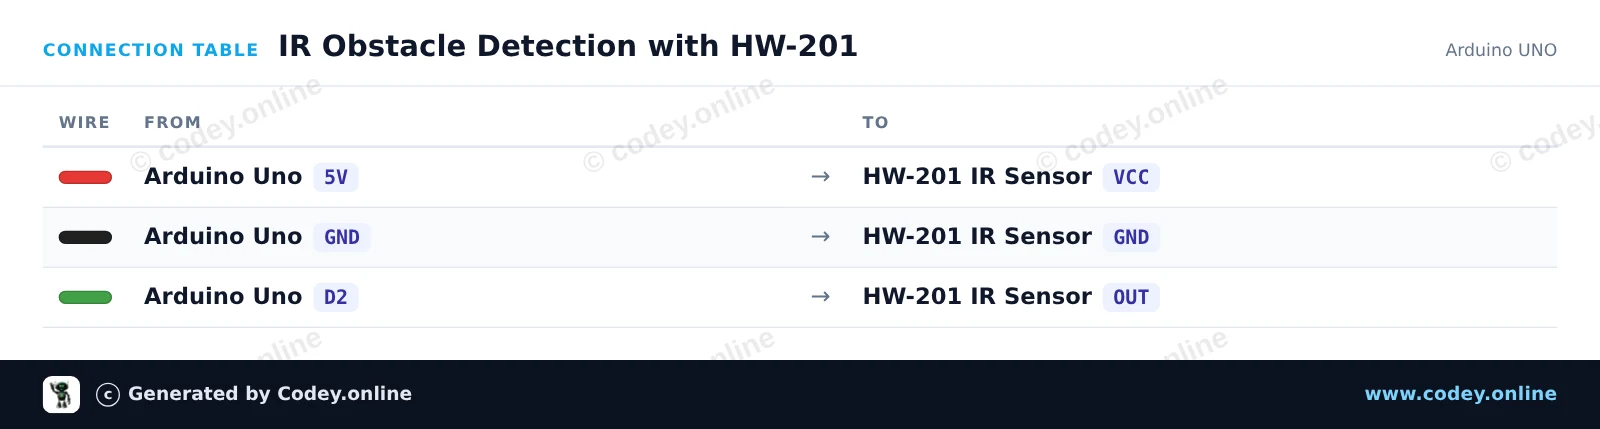
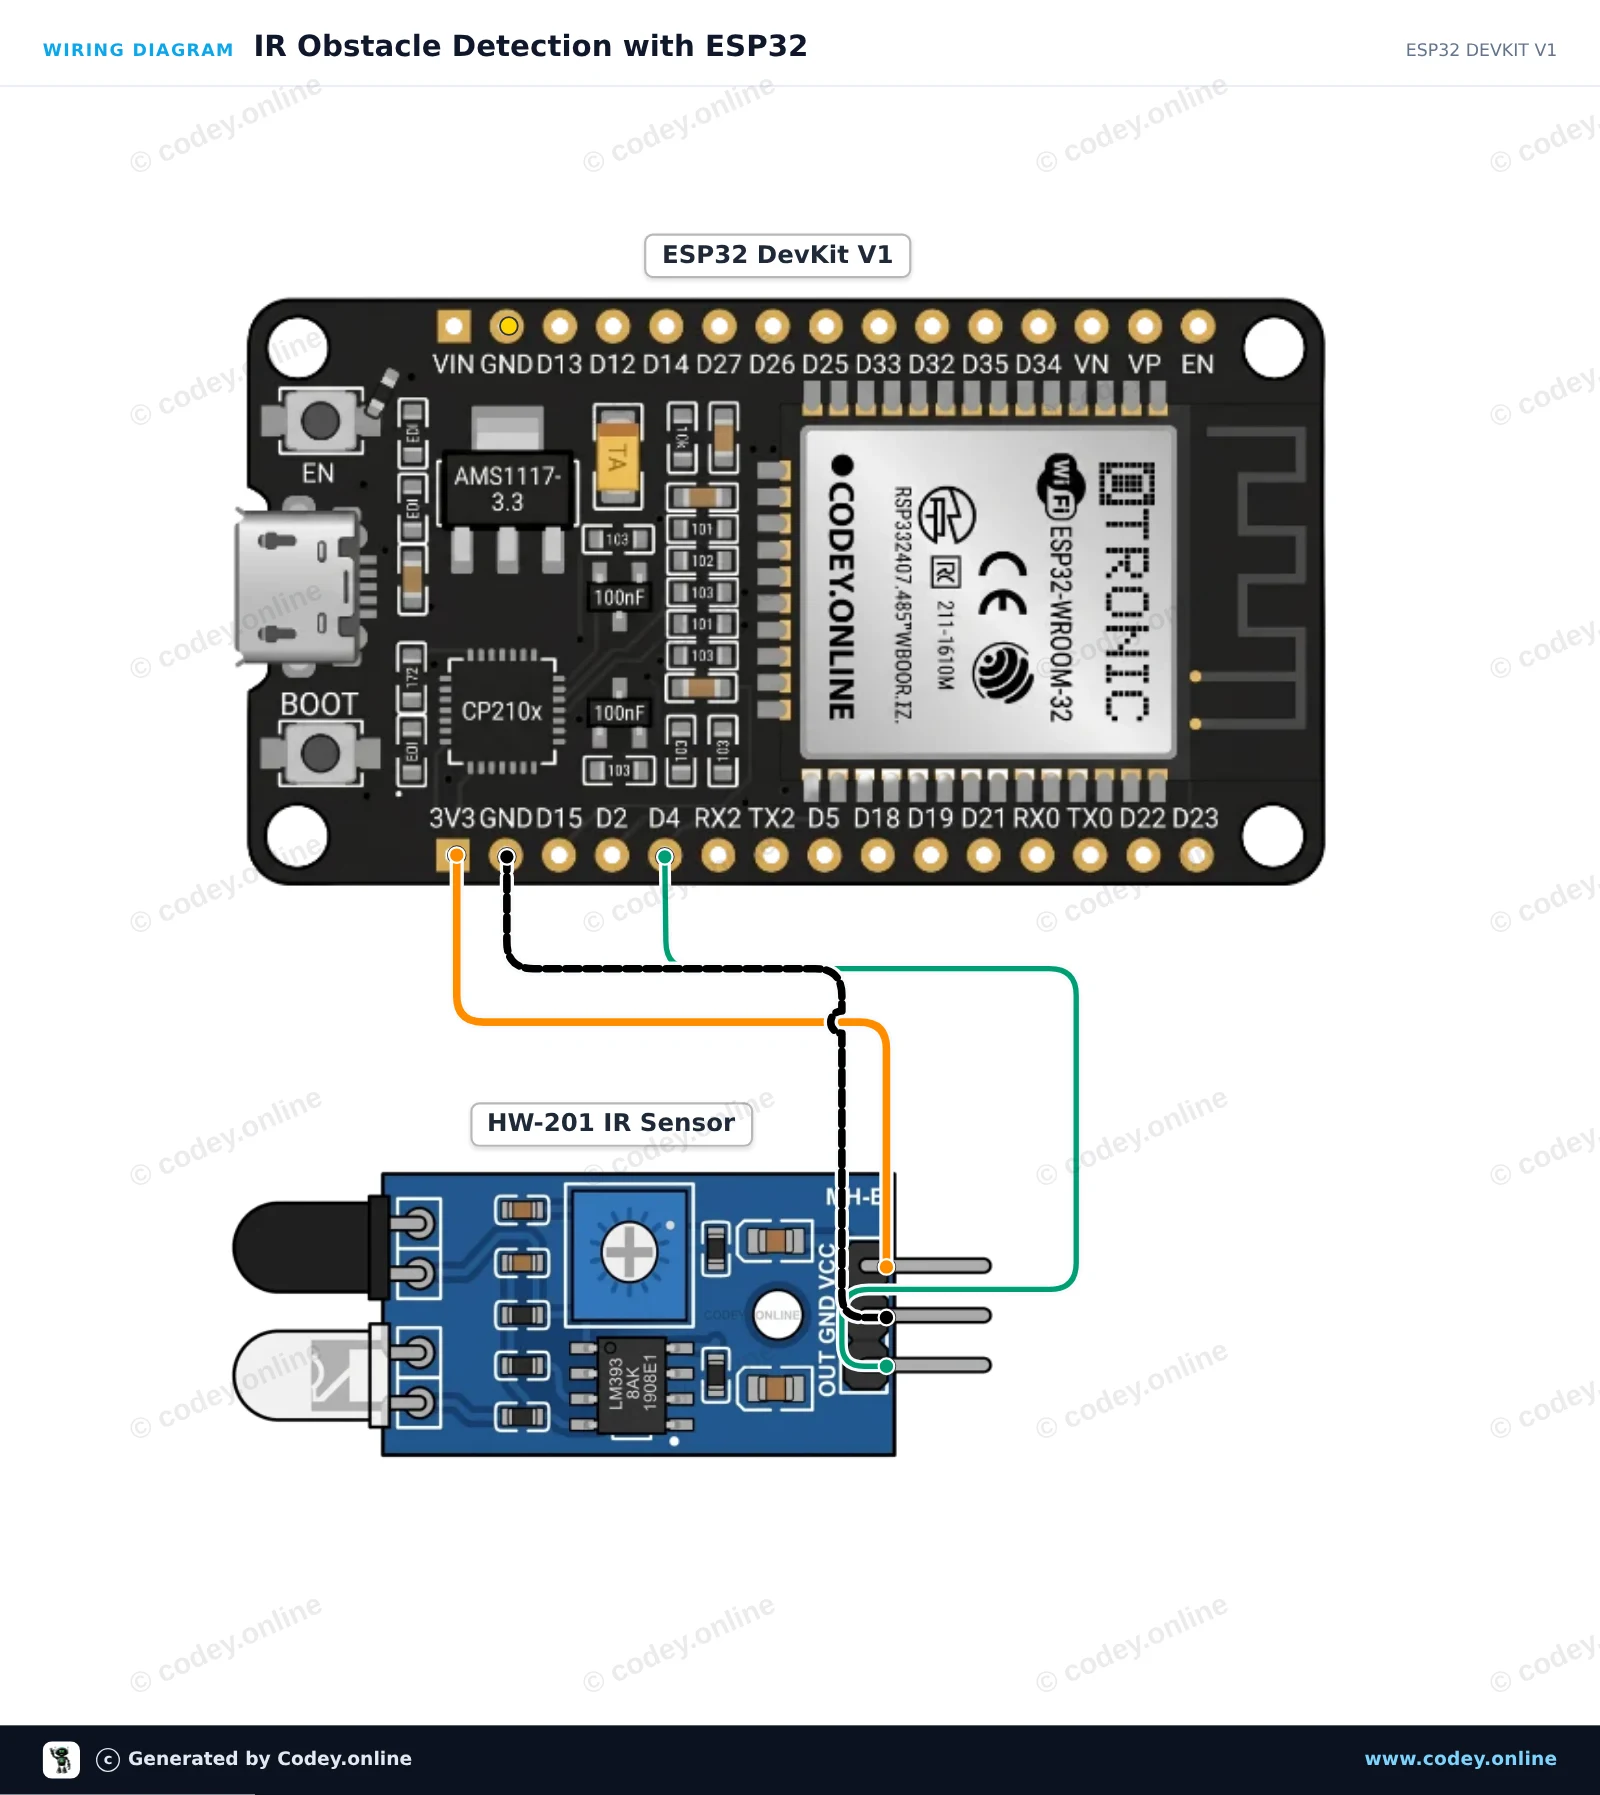
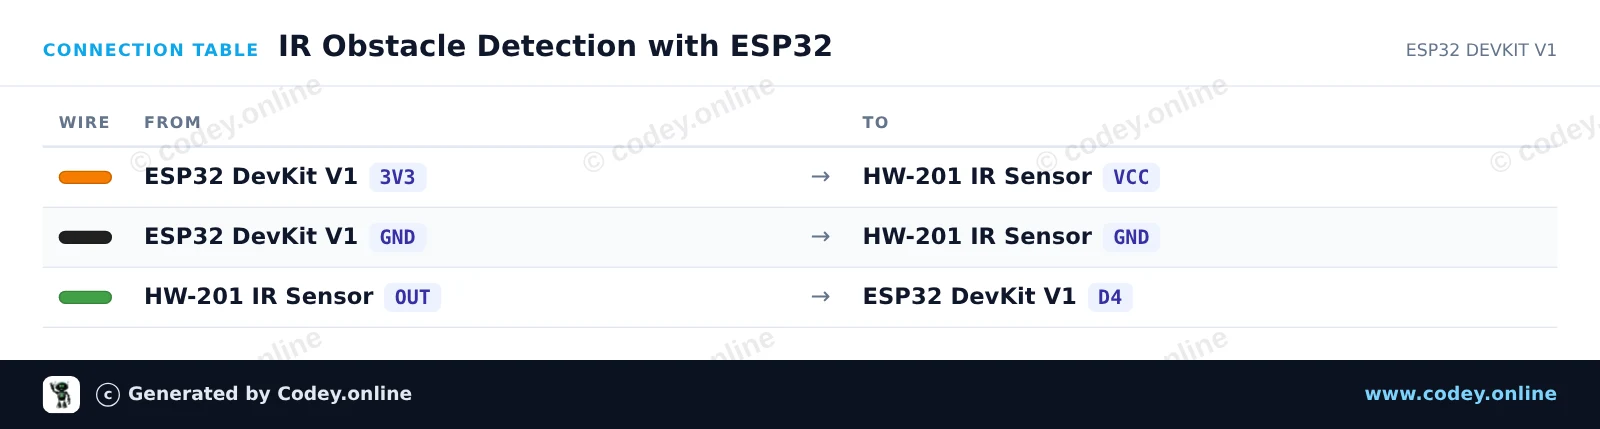
Así conectas el Módulo de evitación de obstáculos por infrarrojos HW-201 a un Arduino UNO o ESP32, con un sketch de ejemplo que puedes subir directamente.
Este proyecto utiliza un sensor infrarrojo de evitación de obstáculos HW-201 para detectar objetos cercanos. Cuando un obstáculo entra en el rango de detección, la salida digital del sensor pasa a LOW, encendiendo el LED integrado del Arduino y mostrando alertas de detección en el Serial Monitor. Ajusta el potenciómetro onboard del módulo sensor para calibrar la distancia de detección.
/*
 * ==================================================================
 *  Generated by Codey.online  —  https://www.codey.online
 * ==================================================================
 *  Project   : IR Obstacle Detection with HW-201
 *  Board     : Arduino UNO (arduino:avr:uno)
 *  Parts     : HW-201 Infrared Obstacle Avoidance Module
 *  Libraries : none (built-in)
 *
 *  Codey Online is an AI-powered browser IDE for Arduino and ESP32.
 *  Describe your project and Codey writes the code, draws the wiring
 *  diagram and uploads it to your board, straight from the browser.
 *  This code is free to use, modify and share, without warranty.
 * ==================================================================
 */

// Pin definitions
const int sensorPin = 2;
const int ledPin = 13;

void setup() {
  pinMode(sensorPin, INPUT);
  pinMode(ledPin, OUTPUT);

  Serial.begin(115200);
  Serial.println(F("HW-201 IR Obstacle Sensor Demo"));
  Serial.println(F("Ready: Move an object in front of the sensor."));
}

void loop() {
  // The HW-201 sensor outputs LOW when an obstacle is detected
  int sensorState = digitalRead(sensorPin);

  if (sensorState == LOW) {
    digitalWrite(ledPin, HIGH);
    Serial.println(F("Obstacle Detected!"));
  } else {
    digitalWrite(ledPin, LOW);
    Serial.println(F("Clear (no obstacle)"));
  }

  delay(200);
}Wiring diagram and example code generated by Codey.online — https://www.codey.online
Este proyecto lee la salida digital del HW-201 Infrared Obstacle Avoidance Module. Cuando se detecta un objeto dentro del rango, la salida del sensor pasa a LOW, encendiendo el LED integrado del ESP32 y mostrando una alerta en el Serial Monitor. Puedes ajustar la distancia de detección con el potenciómetro del módulo.
/*
 * ==================================================================
 *  Generated by Codey.online  —  https://www.codey.online
 * ==================================================================
 *  Project   : IR Obstacle Detection with ESP32
 *  Board     : ESP32 DEVKIT V1 (esp32:esp32:esp32doit-devkit-v1)
 *  Parts     : HW-201 Infrared Obstacle Avoidance Module
 *  Libraries : none (built-in)
 *
 *  Codey Online is an AI-powered browser IDE for Arduino and ESP32.
 *  Describe your project and Codey writes the code, draws the wiring
 *  diagram and uploads it to your board, straight from the browser.
 *  This code is free to use, modify and share, without warranty.
 * ==================================================================
 */

// HW-201 IR Obstacle Sensor with ESP32
const int SENSOR_PIN = 4;   // Connected to OUT pin of HW-201
const int LED_PIN = 2;      // Onboard LED

void setup() {
  Serial.begin(115200);
  pinMode(SENSOR_PIN, INPUT);
  pinMode(LED_PIN, OUTPUT);

  Serial.println("HW-201 Obstacle Sensor Ready");
}

void loop() {
  // The HW-201 output is active-LOW (LOW when an obstacle is detected)
  int sensorState = digitalRead(SENSOR_PIN);

  if (sensorState == LOW) {
    digitalWrite(LED_PIN, HIGH);
    Serial.println("Obstacle detected!");
  } else {
    digitalWrite(LED_PIN, LOW);
    Serial.println("Path clear");
  }

  delay(200);
}Wiring diagram and example code generated by Codey.online — https://www.codey.online





 English
  Nederlands
  Frans
Frans  Deutsch
  Italiano
  Suomi
Suomi  Polski
  Dansk
Dansk  Ελληνικά
  Български
  Čeština
  Hrvatski
  Svenska
  Aileen