SKU: OT2044-D79 Número de artículo: AA440 EAN: 8720589817333

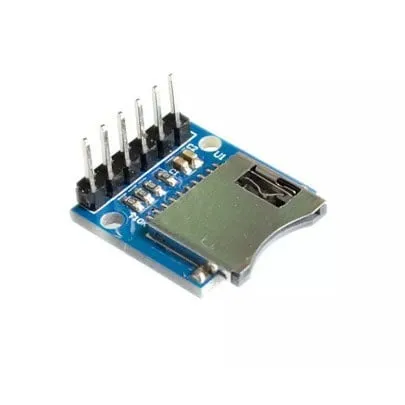
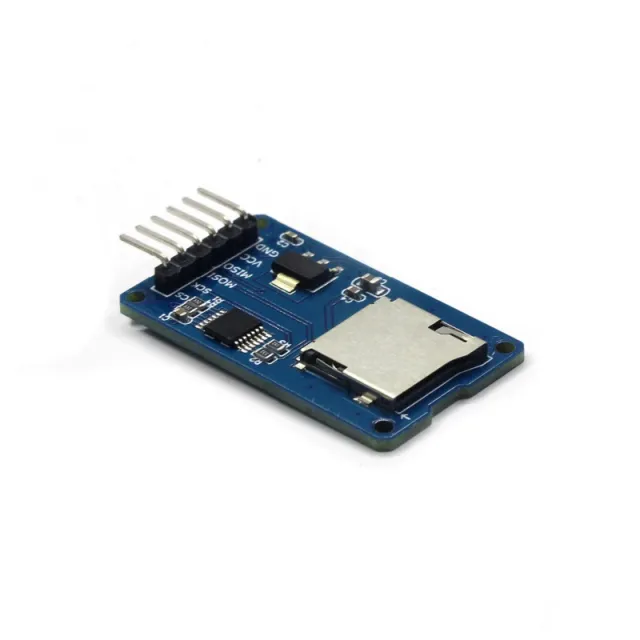
Sencillo módulo lector de tarjetas MicroSD. Gracias a su funcionamiento a 3.3V es muy adecuado para, por ejemplo, ESP32 o ESP8266. El módulo está equipado con las necesarias resistencias pull-up de 10K en las líneas de datos.
Especificaciones:
– Tensión de funcionamiento: 3.3V
- Tipo de ranura micro SD: Push-Pull
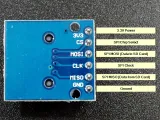
– Interfaz: SPI
– Tensión de funcionamiento (nivel lógico): 3.3V
Los headers de pines ya vienen soldados.
Dimensiones
Longitud: 2cm
Anchura: 1,8cm
Altura: 1,1cm
Así conectas el Módulo de tarjeta Micro SD de 3.3V para ESP32 | ESP8266 a un Arduino UNO o ESP32, con un sketch de ejemplo que puedes subir directamente.
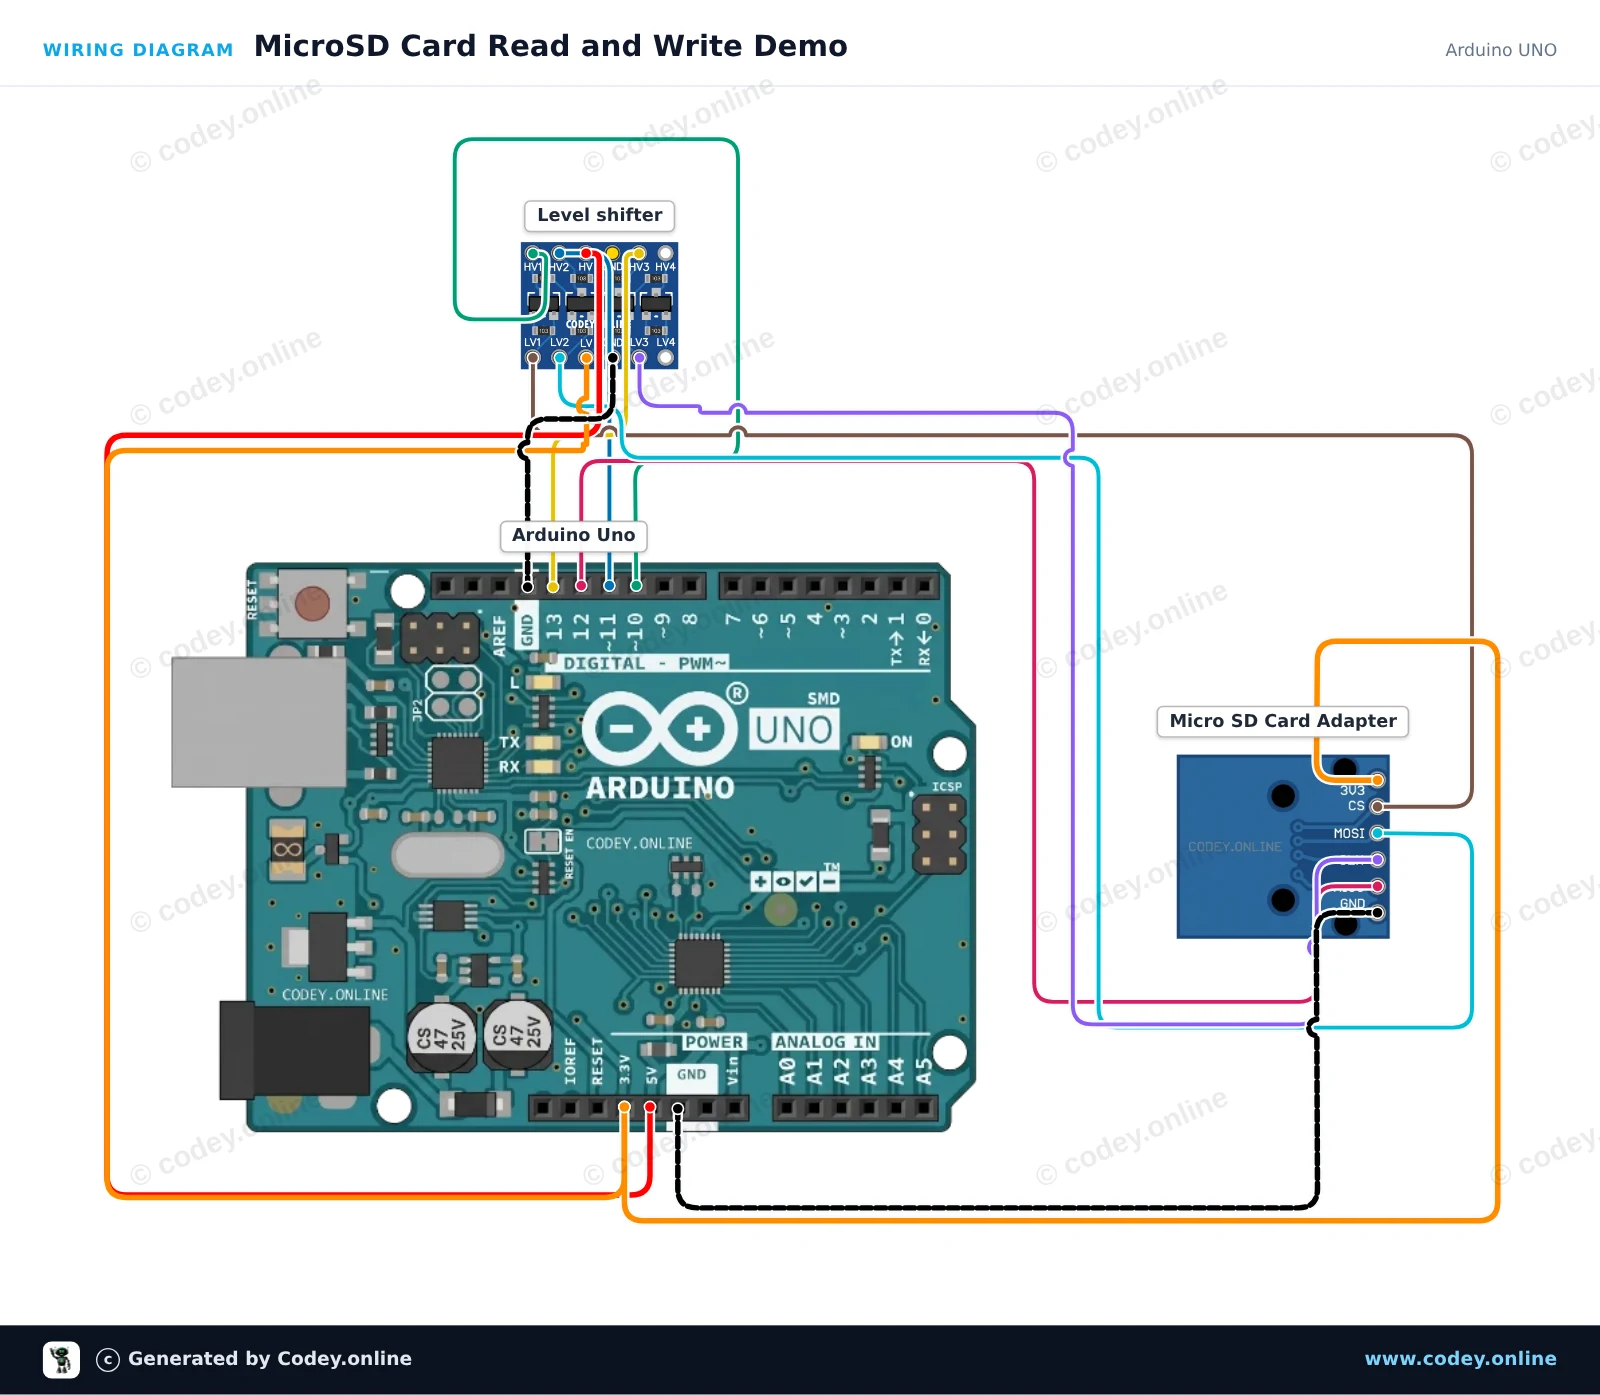
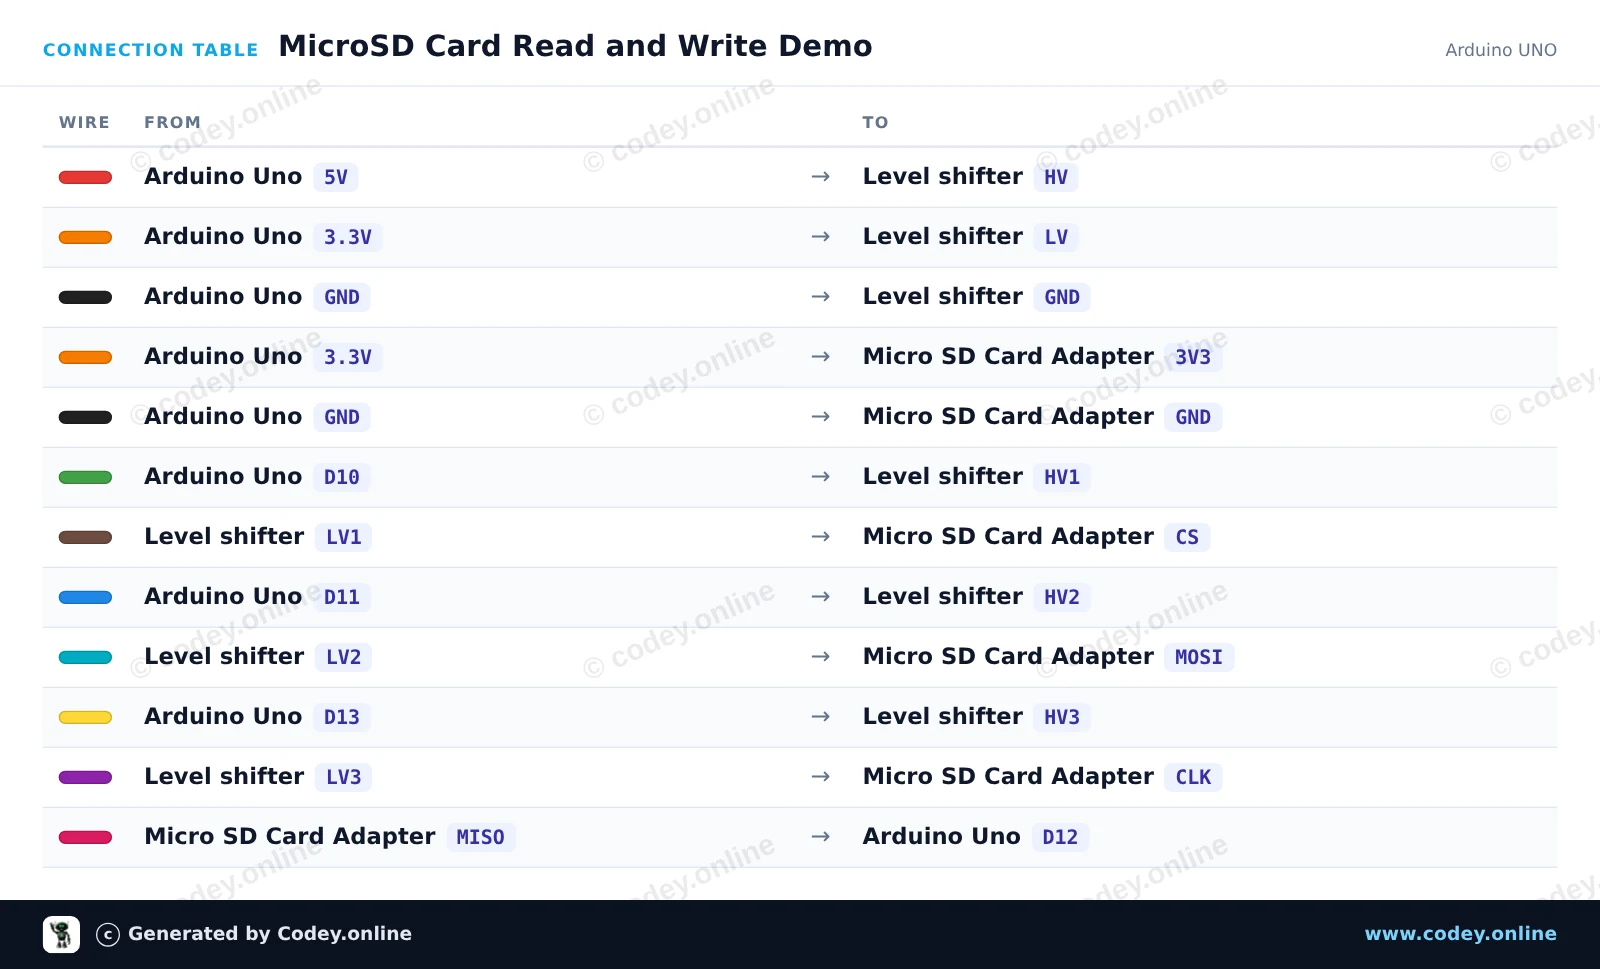
Este proyecto muestra cómo escribir texto en una tarjeta microSD y leerlo de nuevo mediante SPI. Un convertidor de nivel lógico de 4 canales adapta de forma segura las señales lógicas de 5V del Arduino Uno a 3.3V para el módulo de tarjeta microSD. Abre el Serial Monitor a 115200 baud para ver el estado de inicialización y el contenido del archivo.
/*
 * ==================================================================
 *  Generated by Codey.online  —  https://www.codey.online
 * ==================================================================
 *  Project   : MicroSD Card Read and Write Demo
 *  Board     : Arduino UNO (arduino:avr:uno)
 *  Parts     : Micro SD Card Adapter Module 3.3V
 *  Libraries : none (built-in)
 *
 *  Codey Online is an AI-powered browser IDE for Arduino and ESP32.
 *  Describe your project and Codey writes the code, draws the wiring
 *  diagram and uploads it to your board, straight from the browser.
 *  This code is free to use, modify and share, without warranty.
 * ==================================================================
 */

#include <SPI.h>
#include <SD.h>

const int chipSelect = 10;

void setup() {
  Serial.begin(115200);
  while (!Serial) {
    ; // Wait for serial port to connect
  }

  Serial.println(F("Initializing SD card..."));

  if (!SD.begin(chipSelect)) {
    Serial.println(F("Initialization failed! Check connections & SD card."));
    return;
  }
  Serial.println(F("Initialization done."));

  // Write to file
  File myFile = SD.open("demo.txt", FILE_WRITE);
  if (myFile) {
    Serial.println(F("Writing to demo.txt..."));
    myFile.println(F("MicroSD card read/write test successful!"));
    myFile.close();
    Serial.println(F("Done writing."));
  } else {
    Serial.println(F("Error opening demo.txt for writing."));
  }

  // Read from file
  myFile = SD.open("demo.txt");
  if (myFile) {
    Serial.println(F("Contents of demo.txt:"));
    while (myFile.available()) {
      Serial.write(myFile.read());
    }
    myFile.close();
  } else {
    Serial.println(F("Error opening demo.txt for reading."));
  }
}

void loop() {
  // Idle
}Wiring diagram and example code generated by Codey.online — https://www.codey.online
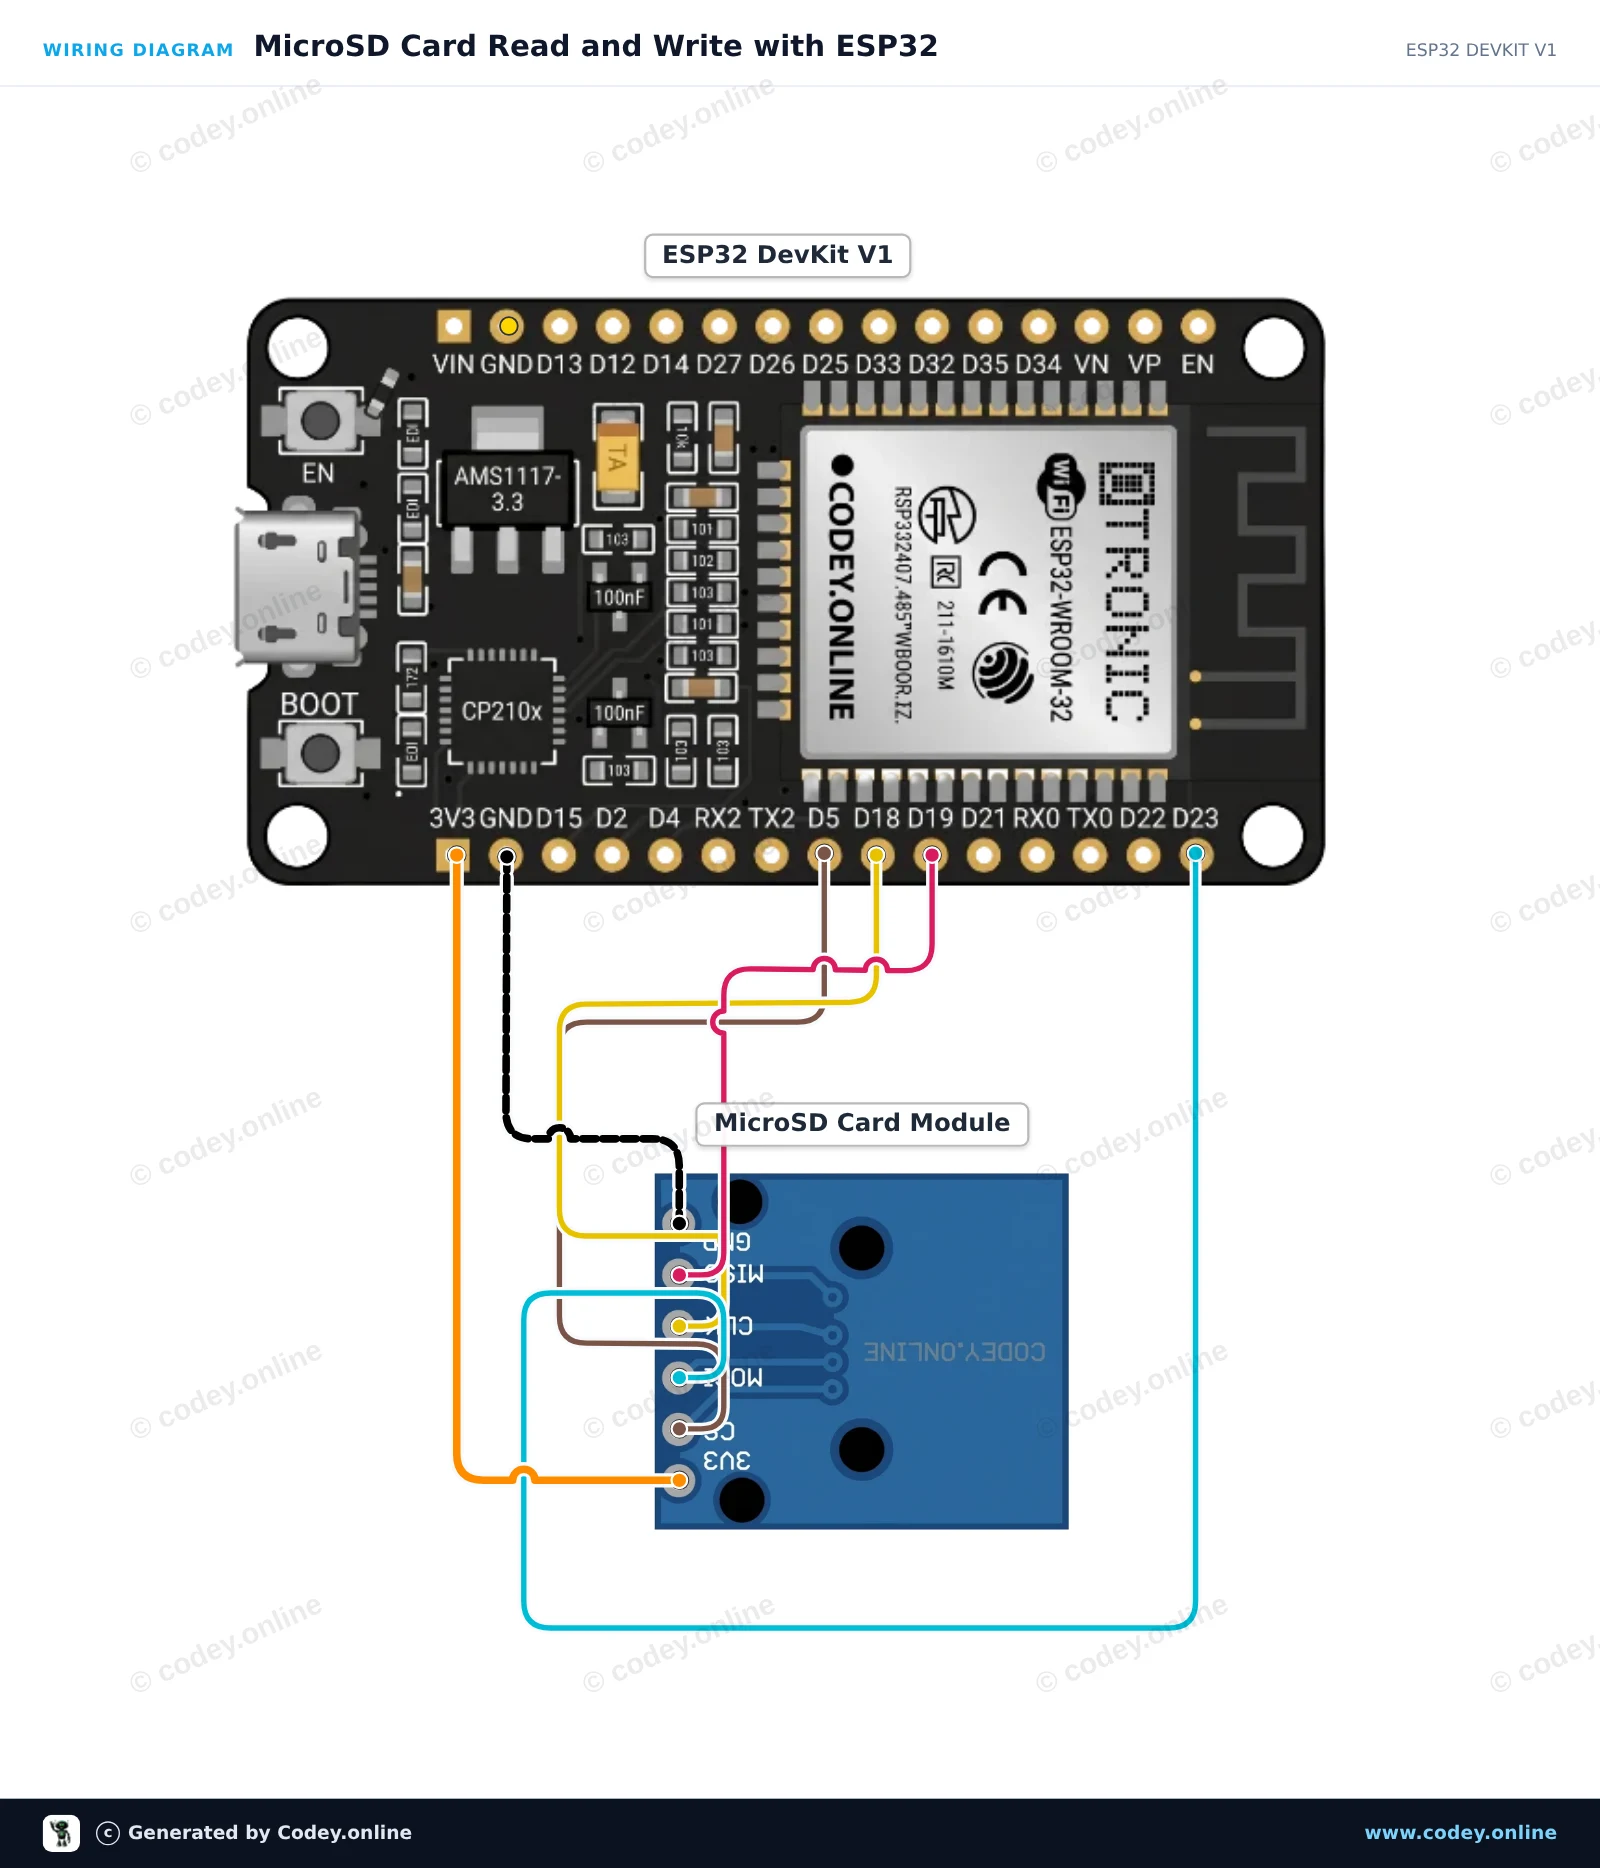
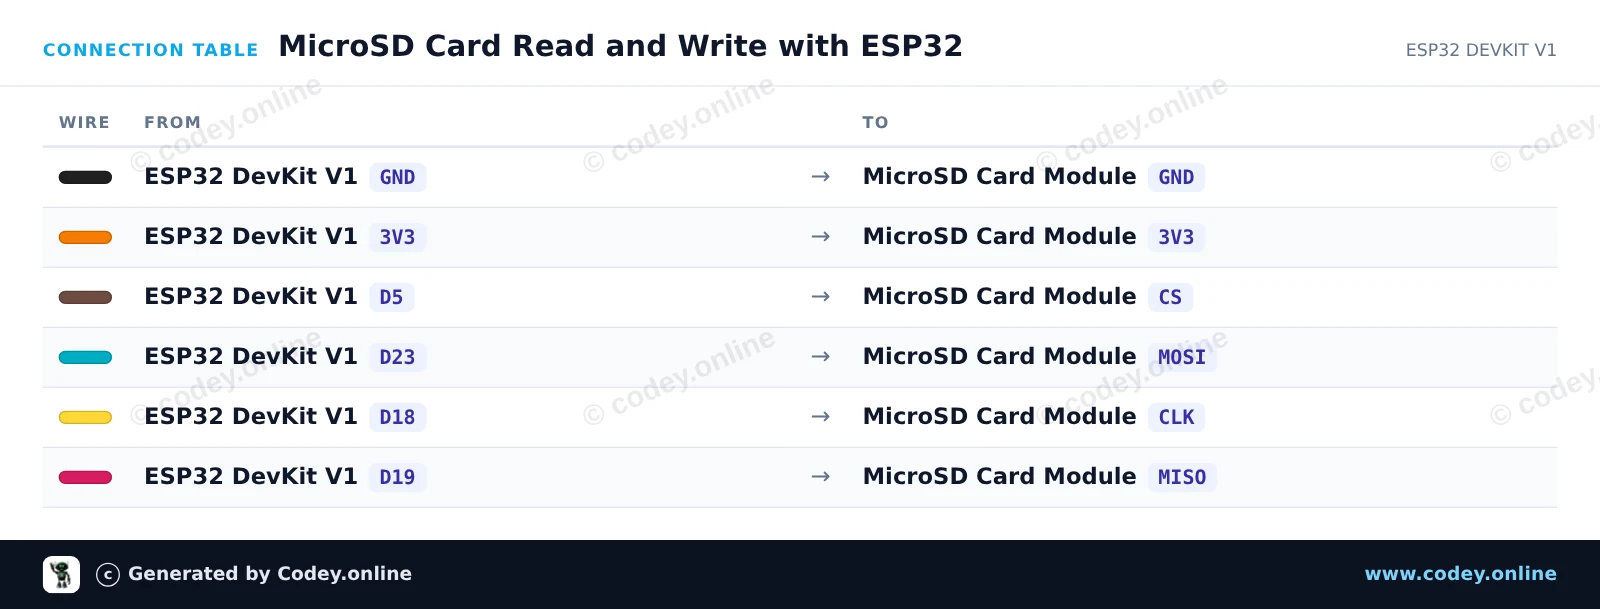
Este ejemplo muestra cómo conectar un módulo de tarjeta MicroSD 3.3V con el ESP32 usando el bus SPI de hardware predeterminado (VSPI). El sketch inicializa la tarjeta SD, escribe un mensaje de prueba en un archivo y lo lee de nuevo para mostrarlo en el Serial Monitor.
/*
 * ==================================================================
 *  Generated by Codey.online  —  https://www.codey.online
 * ==================================================================
 *  Project   : MicroSD Card Read and Write with ESP32
 *  Board     : ESP32 DEVKIT V1 (esp32:esp32:esp32doit-devkit-v1)
 *  Parts     : Micro SD Card Adapter Module 3.3V
 *  Libraries : none (built-in)
 *
 *  Codey Online is an AI-powered browser IDE for Arduino and ESP32.
 *  Describe your project and Codey writes the code, draws the wiring
 *  diagram and uploads it to your board, straight from the browser.
 *  This code is free to use, modify and share, without warranty.
 * ==================================================================
 */

#include "FS.h"
#include "SD.h"
#include "SPI.h"

const int chipSelect = 5;

void setup() {
  Serial.begin(115200);
  while (!Serial) { delay(10); }

  Serial.println("\n--- MicroSD Card Demo ---");

  // Initialize SD card on default VSPI pins (CS = GPIO 5)
  if (!SD.begin(chipSelect)) {
    Serial.println("Card Mount Failed! Check wiring and make sure card is FAT32 formatted.");
    return;
  }

  uint8_t cardType = SD.cardType();
  if (cardType == CARD_NONE) {
    Serial.println("No SD card attached.");
    return;
  }

  Serial.print("SD Card Type: ");
  if (cardType == CARD_MMC) {
    Serial.println("MMC");
  } else if (cardType == CARD_SD) {
    Serial.println("SDSC");
  } else if (cardType == CARD_SDHC) {
    Serial.println("SDHC");
  } else {
    Serial.println("UNKNOWN");
  }

  uint64_t cardSize = SD.cardSize() / (1024 * 1024);
  Serial.printf("SD Card Size: %lluMB\n", cardSize);

  // Write to a test file
  Serial.println("Writing to test.txt...");
  File file = SD.open("/test.txt", FILE_WRITE);
  if (file) {
    file.println("Hello from ESP32!");
    file.println("MicroSD read/write test successful.");
    file.close();
    Serial.println("Write complete.");
  } else {
    Serial.println("Failed to open file for writing.");
    return;
  }

  // Read back the test file
  Serial.println("Reading from test.txt:");
  file = SD.open("/test.txt");
  if (file) {
    while (file.available()) {
      Serial.write(file.read());
    }
    file.close();
  } else {
    Serial.println("Failed to open file for reading.");
  }
}

void loop() {
  // Nothing to repeat in this test
  delay(1000);
}Wiring diagram and example code generated by Codey.online — https://www.codey.online





 English
  Nederlands
  Frans
Frans  Deutsch
  Italiano
  Suomi
Suomi  Polski
  Dansk
Dansk  Ελληνικά
  Български
  Čeština
  Hrvatski
  Aileen