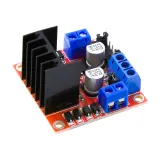
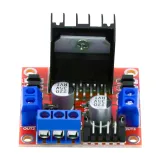
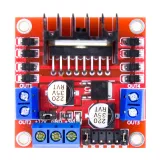
SKU: OT2099-B41 Número de artículo: AA034 EAN: 8720589817425

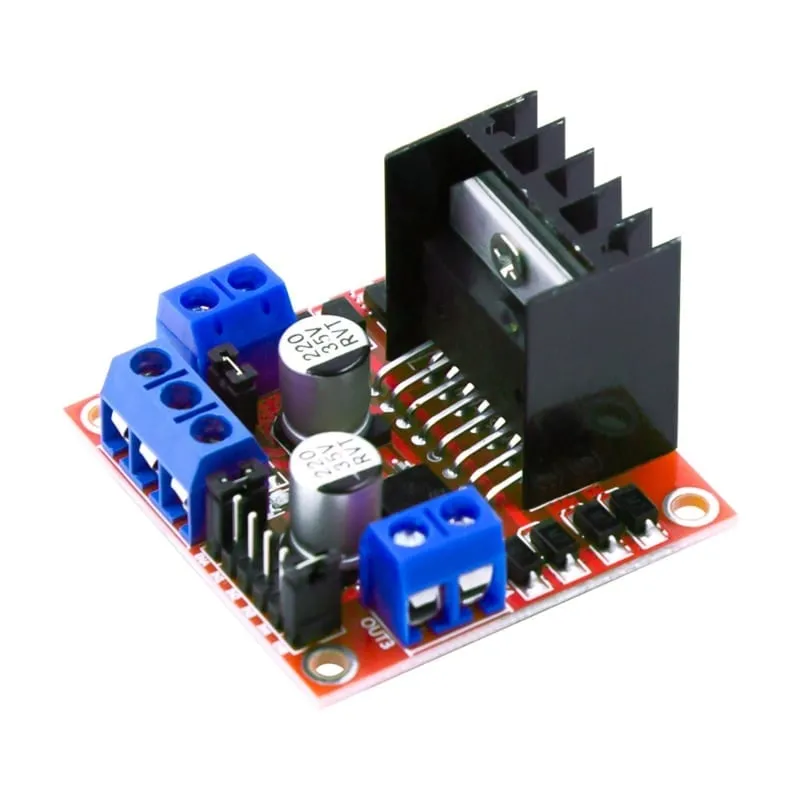
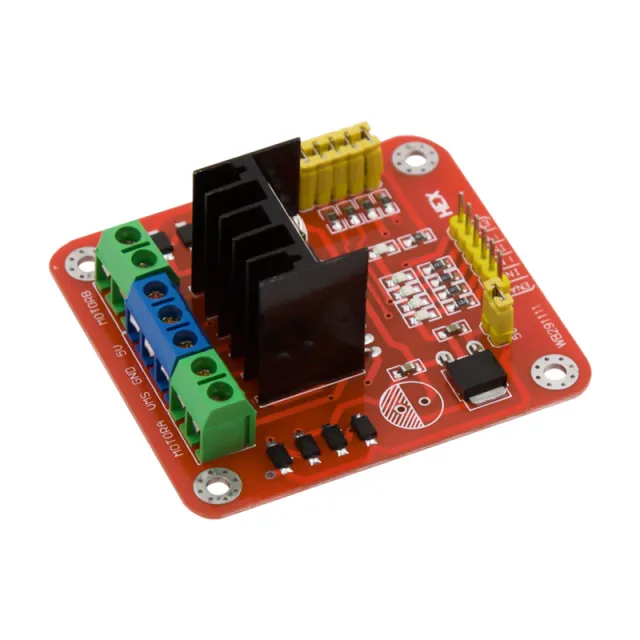
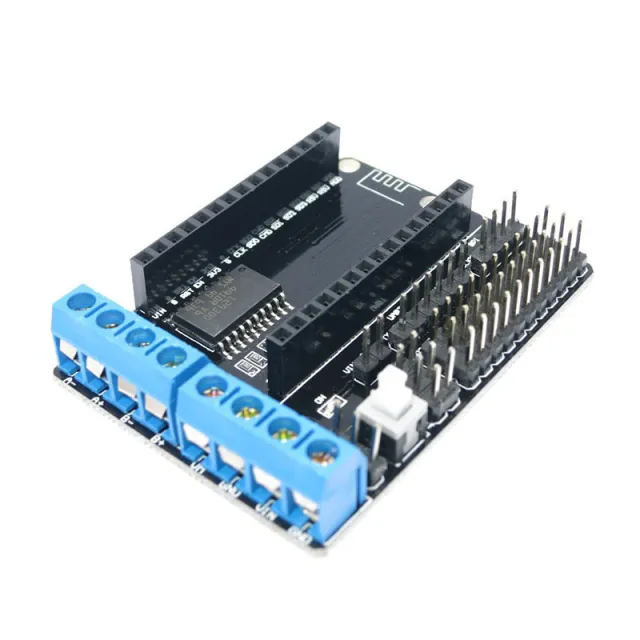
Con esta L298N Motor Driver Board puedes controlar fácilmente motores DC y motores paso a paso con, por ejemplo, un Arduino, ESP32, Raspberry Pi, microcontrolador u otro sistema de control digital.
El módulo está construido alrededor del conocido L298N Dual H-Bridge motordriver. Gracias a los dos puentes H integrados, puedes controlar de forma independiente dos motores DC con escobillas convencionales, incluyendo el sentido de giro y el control de velocidad. Además, el módulo puede utilizarse para controlar un motor paso a paso bipolar.
La alimentación del motor puede, según las especificaciones de este módulo, estar entre 5 y 35 V DC. La lógica funciona a 5 V. El L298N admite una corriente de hasta 2 A por canal en condiciones adecuadas, siendo importante una buena refrigeración con cargas más altas.
El L298N no solo está pensado para motores paso a paso. La placa es muy adecuada para controlar motores DC brushed convencionales.
Con un solo módulo se pueden controlar de forma independiente hasta dos motores DC:
A través de las entradas digitales puedes determinar el sentido de giro de cada motor. Mediante las conexiones ENA y ENB también se puede aplicar una señal PWM para regular la velocidad de los motores.
Esto permite, entre otras, las siguientes funciones:
Esto hace que el módulo sea adecuado, entre otros, para coches robot, vehículos, pequeñas máquinas, actuadores, ventiladores y otros proyectos con motores DC.
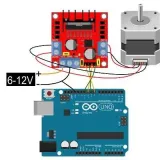
Los dos puentes H también pueden utilizarse juntos para controlar un motor paso a paso bipolar. Las cuatro salidas de motor OUT1 a OUT4 se conectan a las dos bobinas del motor paso a paso.
El orden en que se activan IN1 a IN4 determina después el sentido de giro y el patrón de pasos.
Para motores DC, la velocidad puede regularse mediante PWM (Pulse Width Modulation).
Para ello se retiran los jumpers de ENA y/o ENB y estas conexiones se enlazan con una salida PWM del microcontrolador.
Si el jumper correspondiente permanece colocado, el canal queda activado de forma continua y el motor puede controlarse mediante los pines IN sin señal PWM independiente.
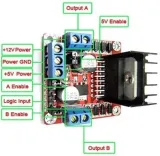
Alimentación del motor / VS
Conexión para la tensión de alimentación de los motores.
GND
Masa común para alimentación y control. La GND del microcontrolador y la del controlador de motor deben estar conectadas entre sí.
5V
Conexión de 5V para la lógica del módulo. Según la configuración del regulador de 5V y del jumper, esta conexión puede funcionar como entrada o salida de alimentación.
OUT1 / OUT2
Salida del puente H A. Aquí se conecta el motor DC A.
IN1 / IN2
Entradas digitales de control con las que se determina el sentido de giro del motor A.
ENA
Entrada de habilitación del motor A. También puede utilizarse para el control de velocidad por PWM.
OUT3 / OUT4
Salida del puente H B. Aquí se conecta el motor DC B.
IN3 / IN4
Entradas digitales de control con las que se determina el sentido de giro del motor B.
ENB
Entrada de habilitación del motor B. También puede utilizarse para el control de velocidad por PWM.
| ENA | IN1 | IN2 | Función |
|---|---|---|---|
| HIGH | HIGH | LOW | Sentido de giro 1 |
| HIGH | LOW | HIGH | Sentido de giro 2 |
| HIGH | LOW | LOW | Parada/freno |
| HIGH | HIGH | HIGH | Parada/freno |
| LOW | X | X | Salida desactivada |
El sentido de giro real depende de cómo estén conectados los dos cables del motor a OUT1 y OUT2.
Para el motor B, el control funciona de la misma manera mediante IN3, IN4 y ENB.
El L298N utilizado es un dual full-bridge driver diseñado especialmente para conmutar cargas inductivas como motores DC, motores paso a paso, relés y solenoides. Según el fabricante, el L298 admite una tensión de alimentación del motor de hasta 46 V y dispone, entre otras cosas, de protección térmica.
En este módulo completo se mantiene una tensión de alimentación del motor de 5 a 35 V DC.
La corriente máxima indicada de 2 A debe considerarse como el valor máximo del driver. Con corrientes continuas más altas del motor se produce una pérdida de calor considerable en el L298N. Por tanto, la corriente continua realmente utilizable depende, entre otras cosas, de la tensión de alimentación, la refrigeración, la temperatura ambiente y la carga.
Comprueba además no solo la corriente nominal de un motor DC, sino también la corriente de arranque y la corriente de bloqueo (stall current). Esta puede ser varias veces superior a la corriente durante el funcionamiento normal.
El L298N utiliza transistores de salida bipolares y, por ello, presenta una mayor caída de tensión que los modernos drivers de motor MOSFET. La tensión que realmente llega al motor es, por tanto, inferior a la tensión de alimentación aplicada.
Esto es especialmente relevante en motores de baja tensión. Para aplicaciones en las que sea muy importante una eficiencia muy alta o una caída de tensión muy pequeña, un driver MOSFET moderno puede ser una mejor opción.
La L298N Motor Driver Board es un versátil doble puente H para controlar tanto motores DC convencionales como motores paso a paso. Con un solo módulo se pueden controlar dos motores DC de forma independiente hacia delante y hacia atrás, y la velocidad puede regularse mediante PWM. Como alternativa, ambos puentes H pueden utilizarse conjuntamente para un motor paso a paso bipolar.
Gracias al sencillo control digital, este módulo es muy adecuado para su uso con Arduino, ESP32 y otros microcontroladores.
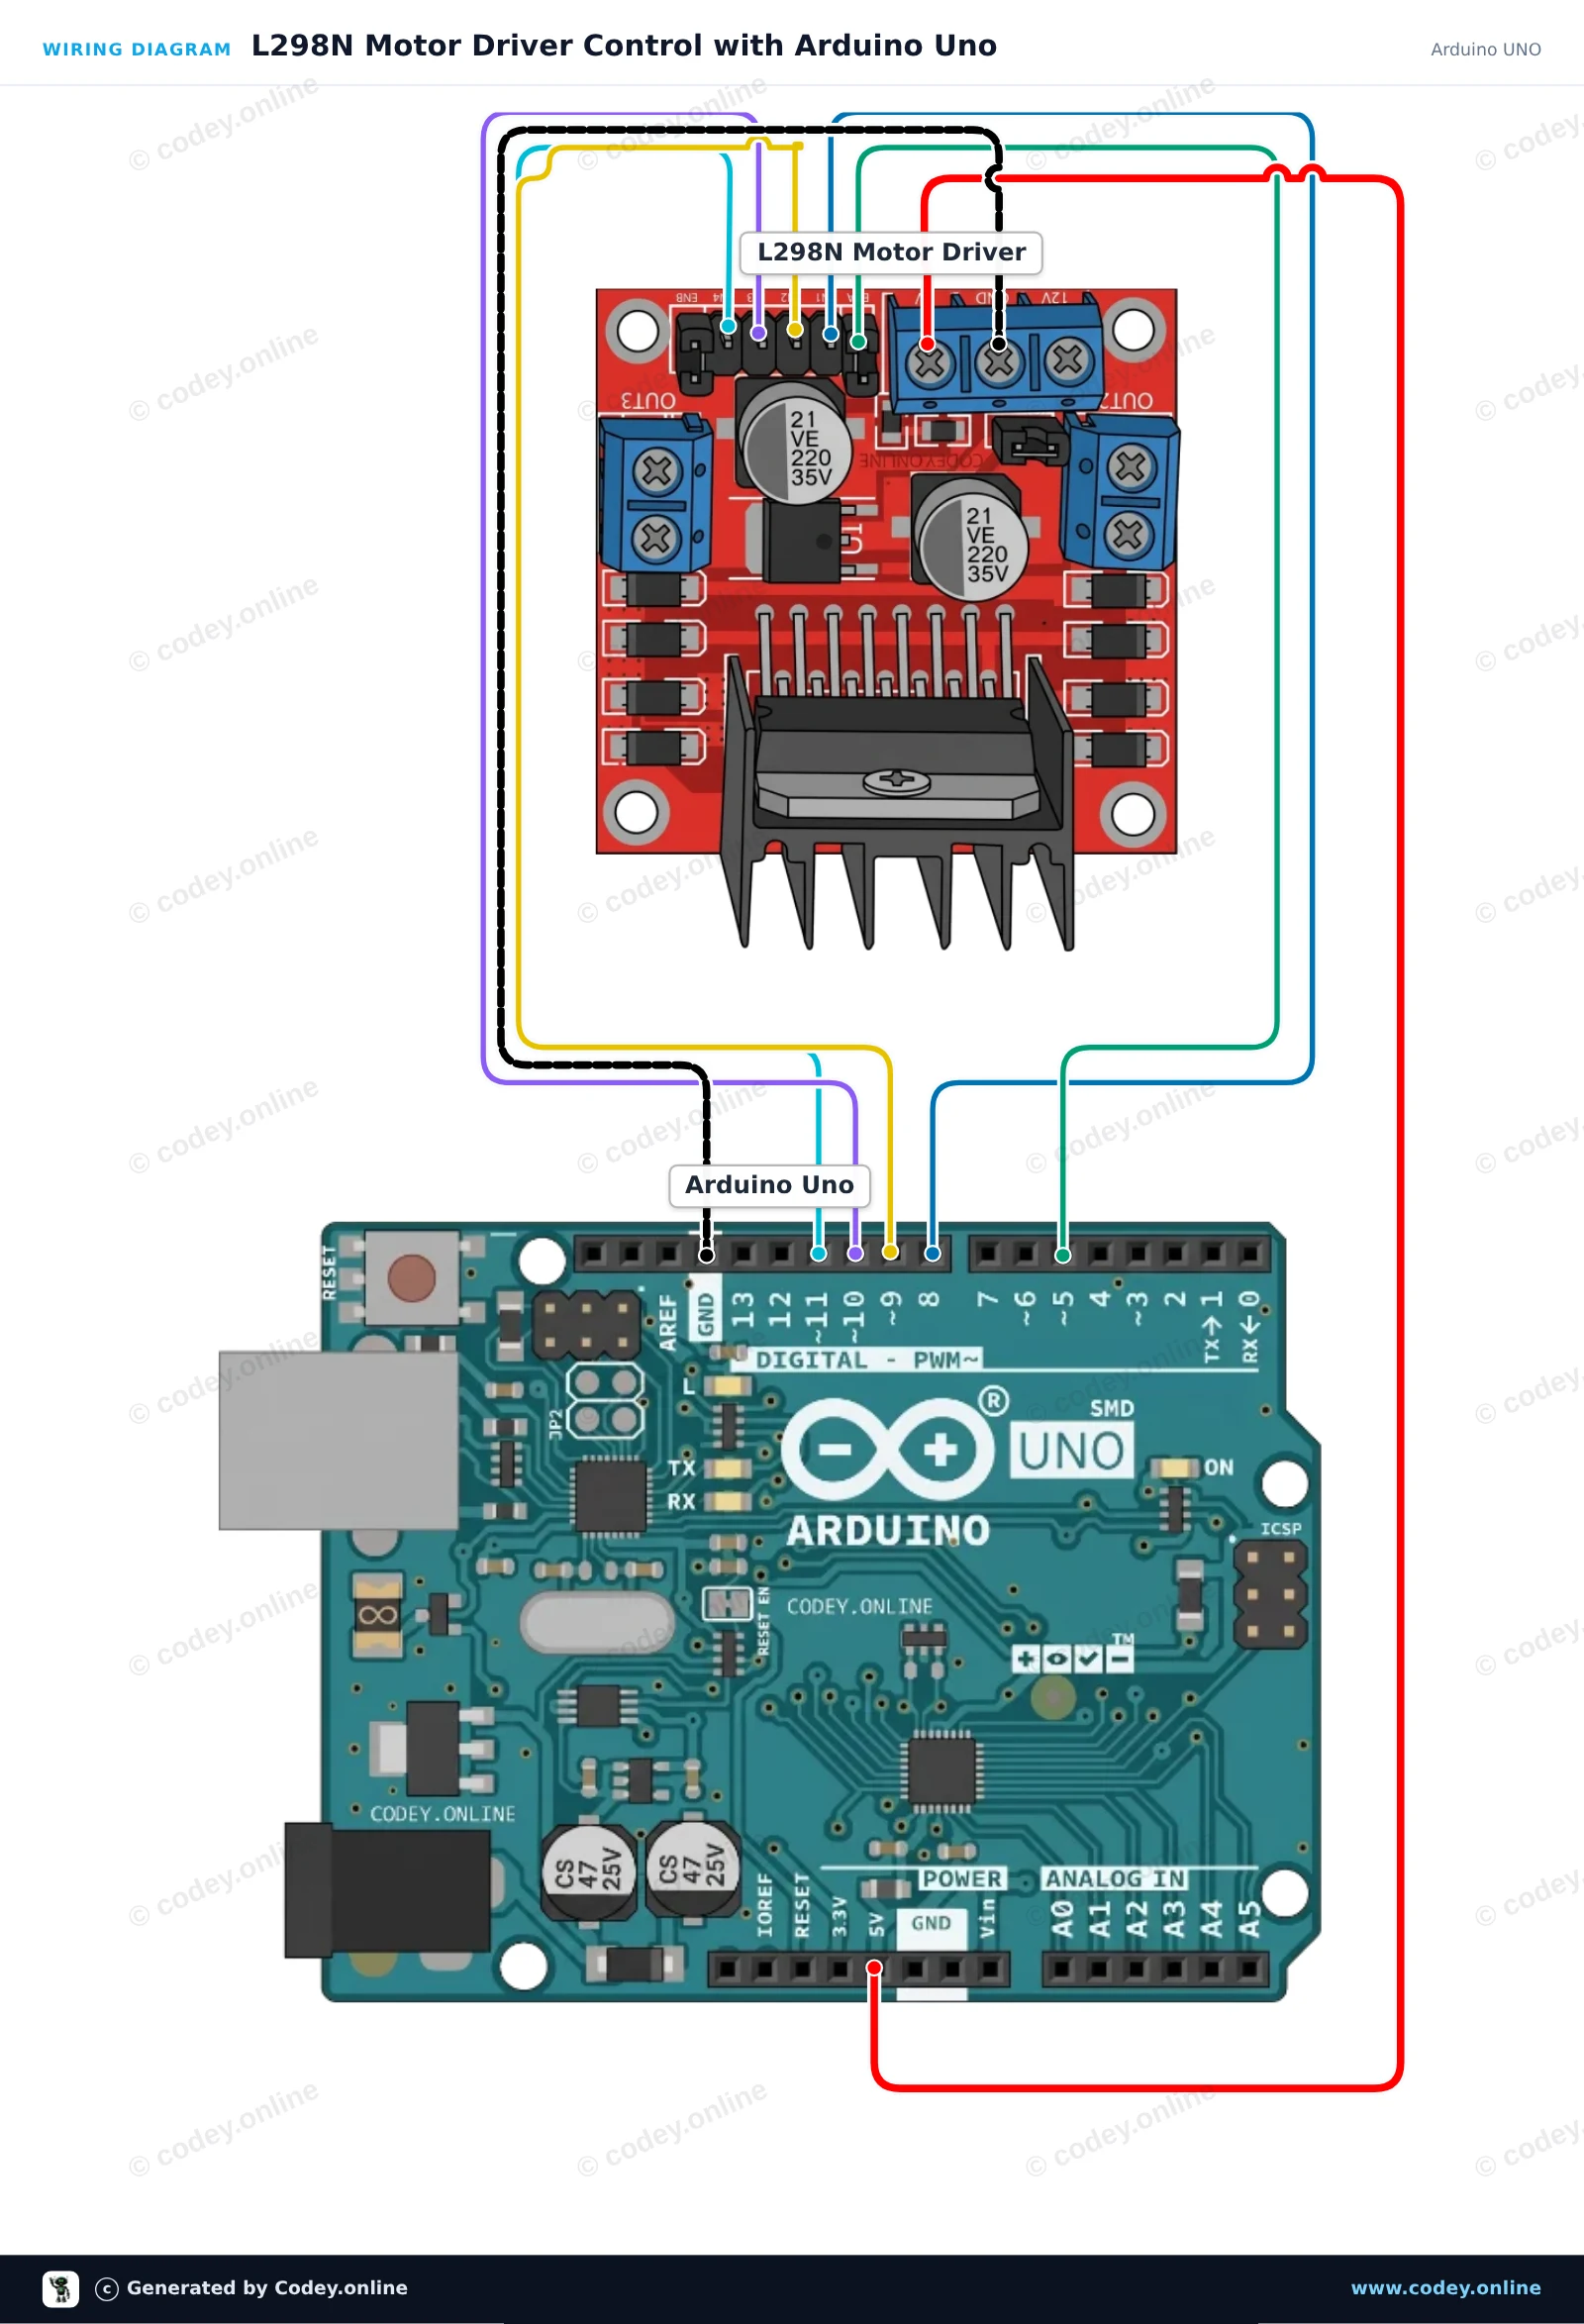
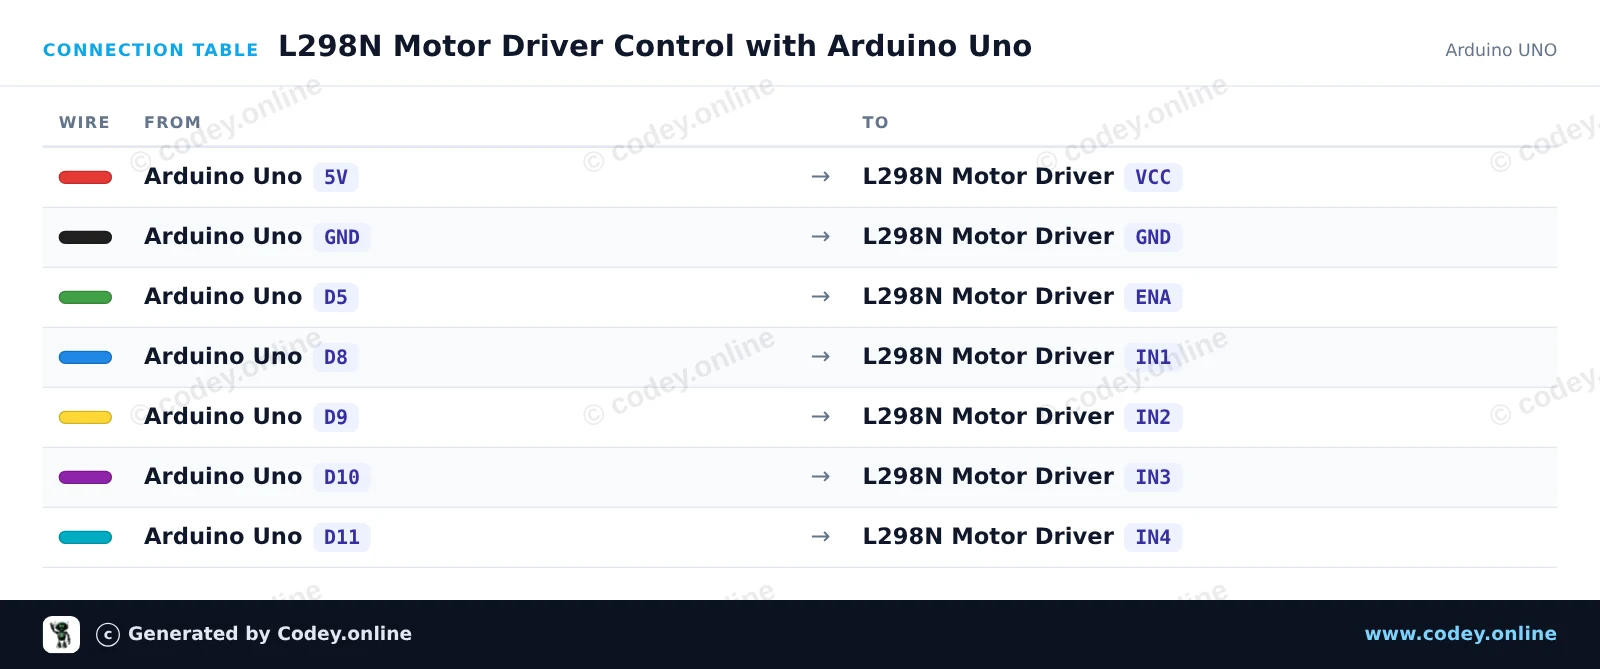
Así conectas el Placa controladora de motor L298N roja a un Arduino UNO o ESP32, con un sketch de ejemplo que puedes subir directamente.
Este ejemplo muestra cómo controlar motores DC usando una placa driver de motor L298N. El Arduino establece la dirección de giro del motor mediante pines lógicos digitales y ajusta la velocidad del motor usando PWM en el pin enable. El programa hace que los motores avancen, se detengan y luego giren en sentido inverso.
/*
 * ==================================================================
 *  Generated by Codey.online  —  https://www.codey.online
 * ==================================================================
 *  Project   : L298N Motor Driver Control with Arduino Uno
 *  Board     : Arduino UNO (arduino:avr:uno)
 *  Parts     : L298N Motor Driver Board
 *  Libraries : none (built-in)
 *
 *  Codey Online is an AI-powered browser IDE for Arduino and ESP32.
 *  Describe your project and Codey writes the code, draws the wiring
 *  diagram and uploads it to your board, straight from the browser.
 *  This code is free to use, modify and share, without warranty.
 * ==================================================================
 */

// L298N Motor Driver Control Demo

const int ENA_PIN = 5;   // PWM speed control
const int IN1_PIN = 8;   // Motor A direction 1
const int IN2_PIN = 9;   // Motor A direction 2
const int IN3_PIN = 10;  // Motor B direction 1
const int IN4_PIN = 11;  // Motor B direction 2

void stopMotors() {
  digitalWrite(IN1_PIN, LOW);
  digitalWrite(IN2_PIN, LOW);
  digitalWrite(IN3_PIN, LOW);
  digitalWrite(IN4_PIN, LOW);
  analogWrite(ENA_PIN, 0);
}

void driveForward(int speedVal) {
  digitalWrite(IN1_PIN, HIGH);
  digitalWrite(IN2_PIN, LOW);
  digitalWrite(IN3_PIN, HIGH);
  digitalWrite(IN4_PIN, LOW);
  analogWrite(ENA_PIN, speedVal);
}

void driveReverse(int speedVal) {
  digitalWrite(IN1_PIN, LOW);
  digitalWrite(IN2_PIN, HIGH);
  digitalWrite(IN3_PIN, LOW);
  digitalWrite(IN4_PIN, HIGH);
  analogWrite(ENA_PIN, speedVal);
}

void setup() {
  Serial.begin(115200);
  pinMode(ENA_PIN, OUTPUT);
  pinMode(IN1_PIN, OUTPUT);
  pinMode(IN2_PIN, OUTPUT);
  pinMode(IN3_PIN, OUTPUT);
  pinMode(IN4_PIN, OUTPUT);

  stopMotors();
  Serial.println(F("L298N Motor Driver initialized."));
}

void loop() {
  Serial.println(F("Driving forward"));
  driveForward(200);
  delay(2000);

  Serial.println(F("Stopping"));
  stopMotors();
  delay(1000);

  Serial.println(F("Driving reverse"));
  driveReverse(200);
  delay(2000);

  Serial.println(F("Stopping"));
  stopMotors();
  delay(1000);
}Wiring diagram and example code generated by Codey.online — https://www.codey.online
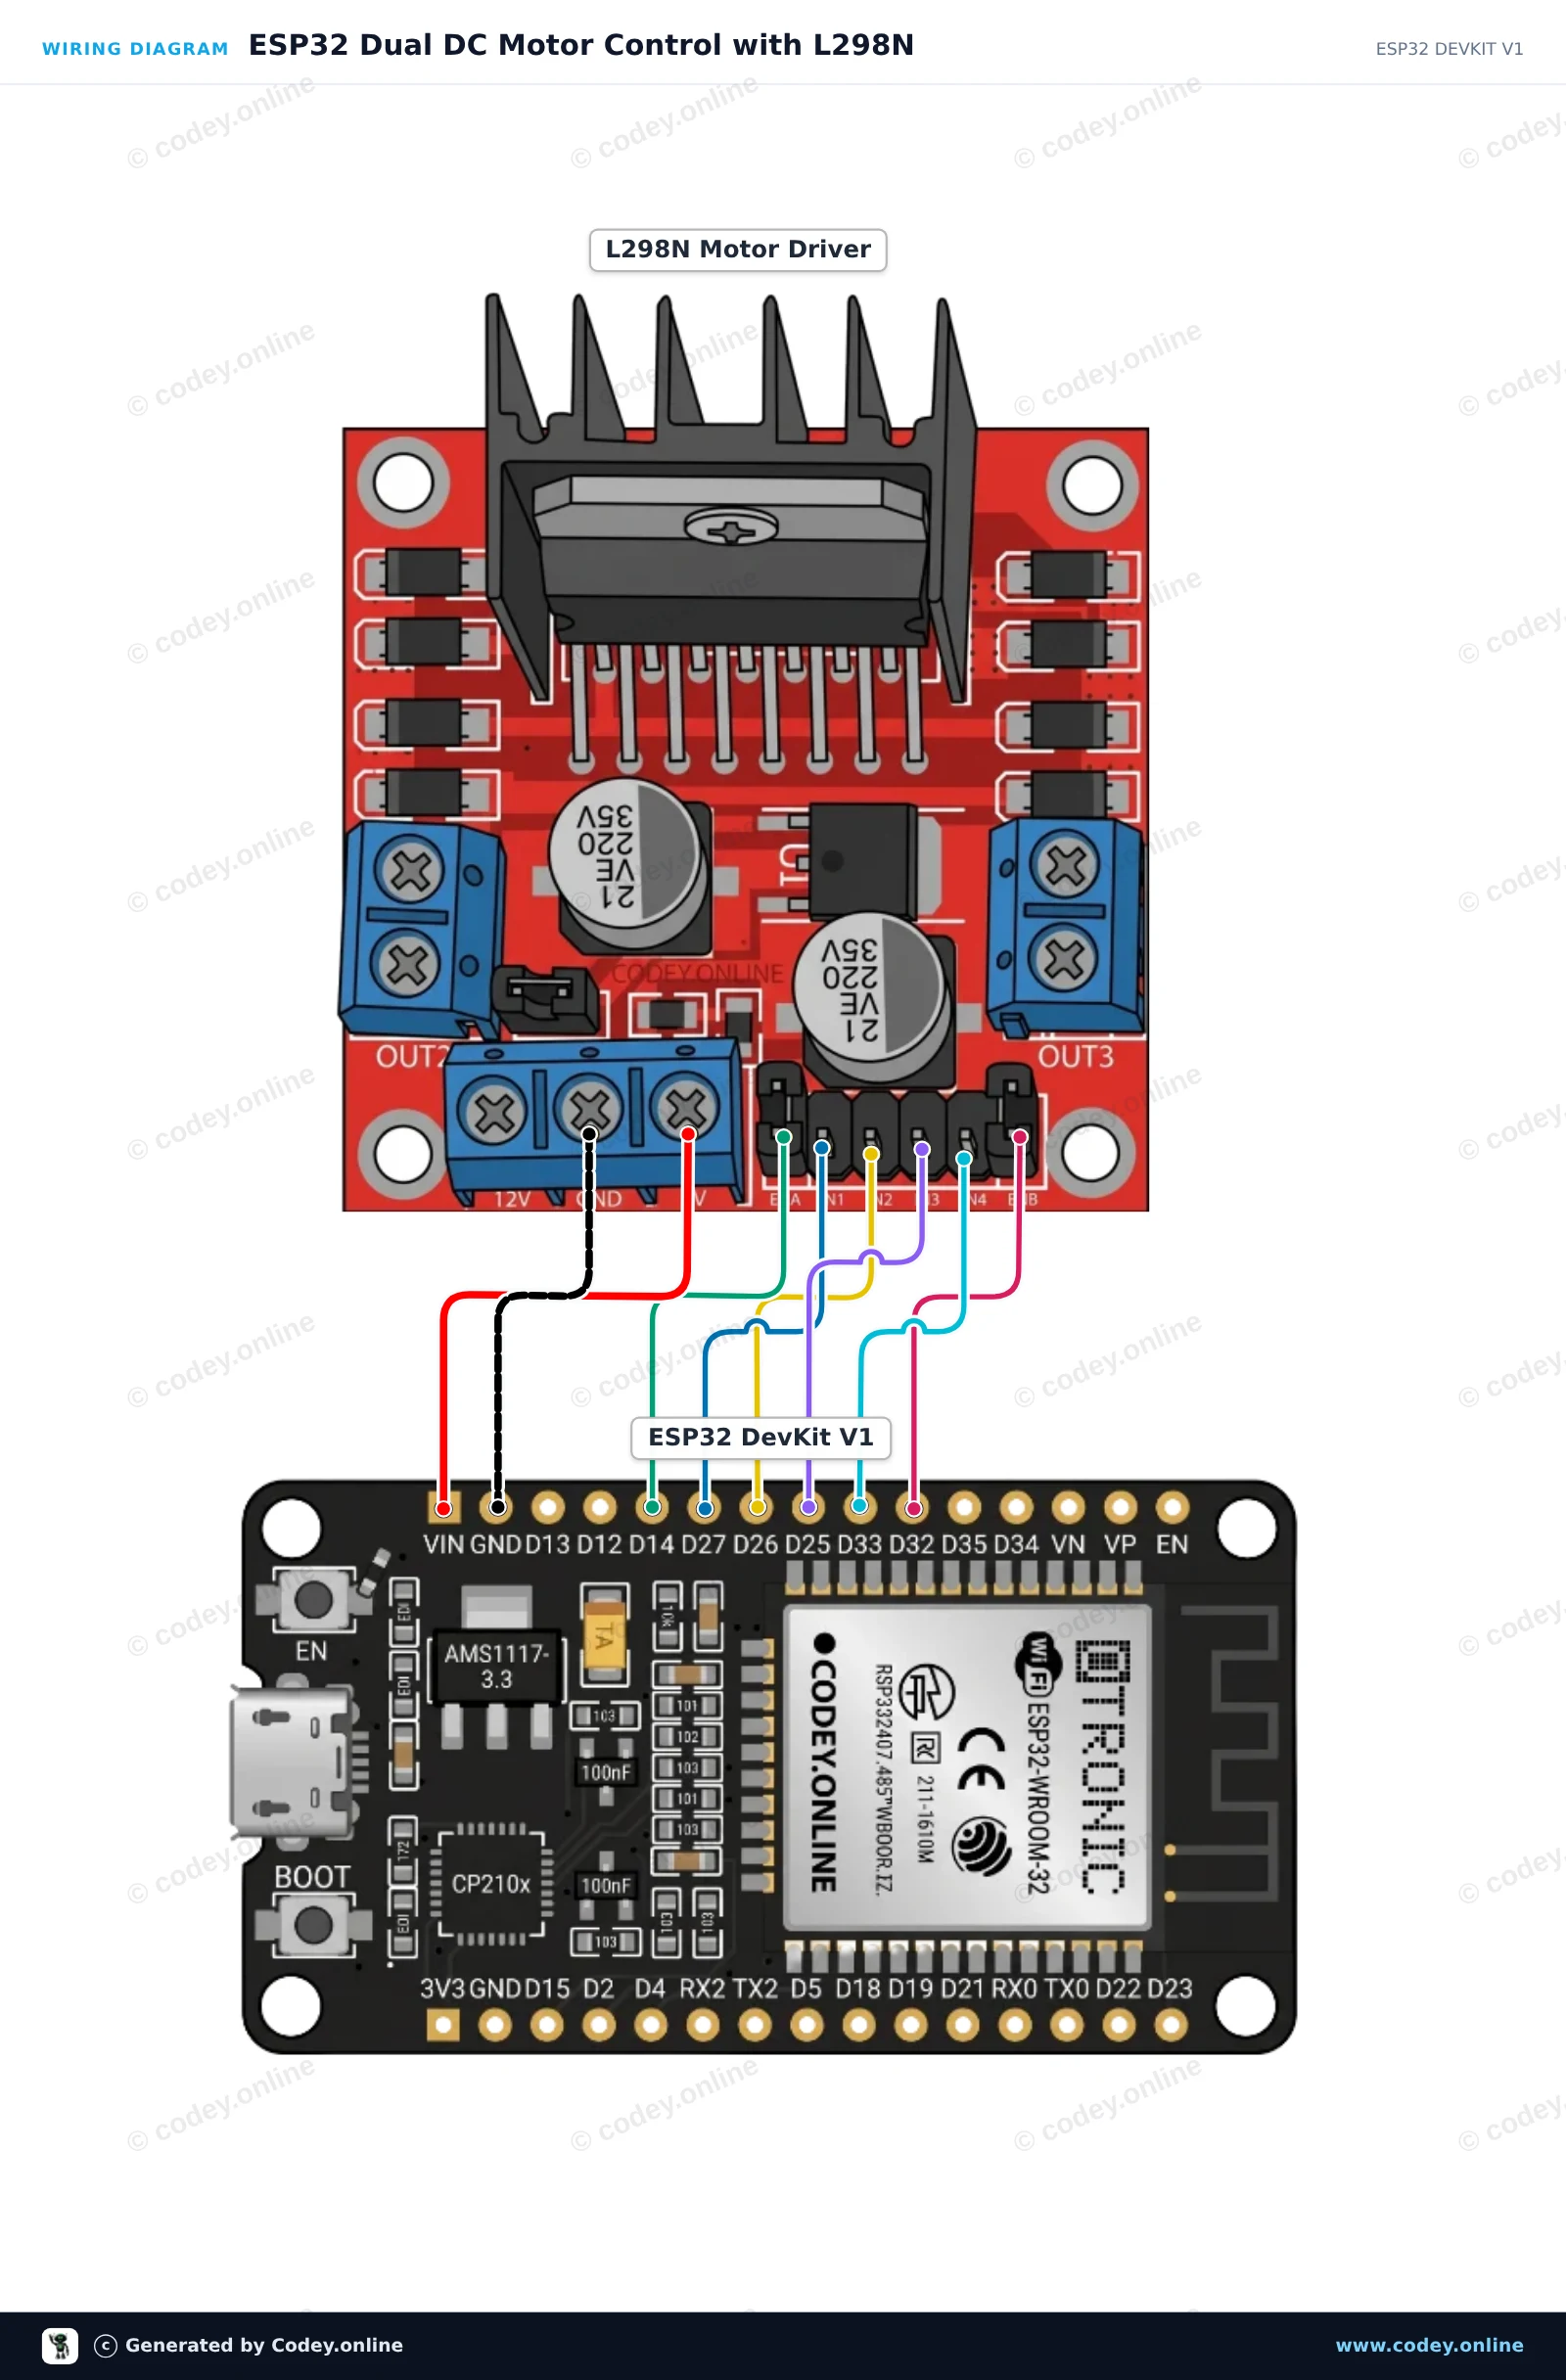
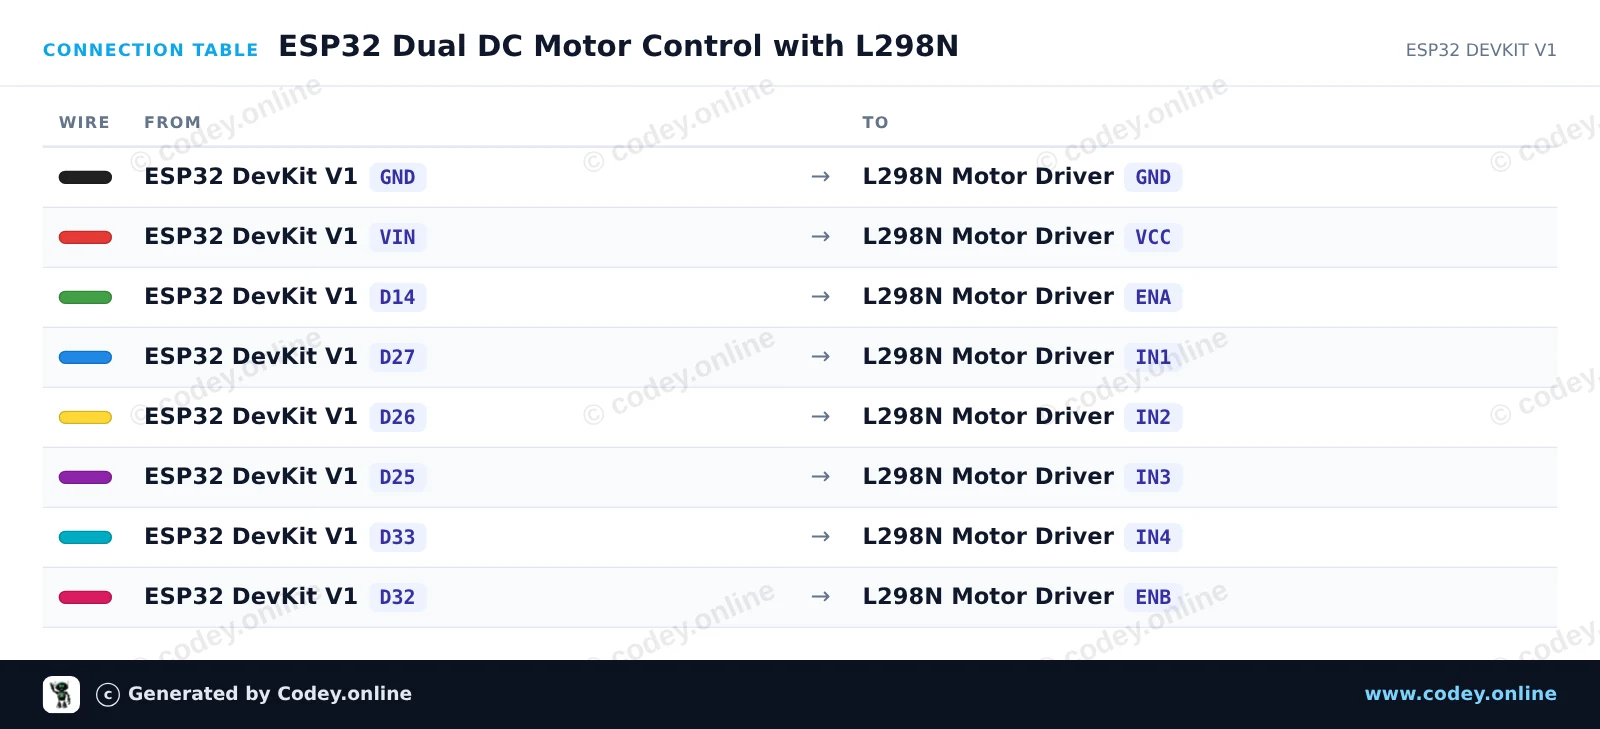
Este proyecto controla dos motores DC usando un ESP32 y un driver de puente H L298N. El sketch hace girar ambos motores hacia adelante, los detiene, los hace girar en reverse y demuestra el control de velocidad por PWM. Conecta alimentación externa al terminal 12V del L298N para proporcionar suficiente corriente a motores más grandes.
/*
 * ==================================================================
 *  Generated by Codey.online  —  https://www.codey.online
 * ==================================================================
 *  Project   : ESP32 Dual DC Motor Control with L298N
 *  Board     : ESP32 DEVKIT V1 (esp32:esp32:esp32doit-devkit-v1)
 *  Parts     : L298N Motor Driver Board
 *  Libraries : none (built-in)
 *
 *  Codey Online is an AI-powered browser IDE for Arduino and ESP32.
 *  Describe your project and Codey writes the code, draws the wiring
 *  diagram and uploads it to your board, straight from the browser.
 *  This code is free to use, modify and share, without warranty.
 * ==================================================================
 */

const int ENA_PIN = 14;
const int IN1_PIN = 27;
const int IN2_PIN = 26;
const int IN3_PIN = 25;
const int IN4_PIN = 33;
const int ENB_PIN = 32;

void setMotors(int speedA, int dirA, int speedB, int dirB) {
  // Motor A direction
  if (dirA > 0) {
    digitalWrite(IN1_PIN, HIGH);
    digitalWrite(IN2_PIN, LOW);
  } else if (dirA < 0) {
    digitalWrite(IN1_PIN, LOW);
    digitalWrite(IN2_PIN, HIGH);
  } else {
    digitalWrite(IN1_PIN, LOW);
    digitalWrite(IN2_PIN, LOW);
  }
  analogWrite(ENA_PIN, speedA);

  // Motor B direction
  if (dirB > 0) {
    digitalWrite(IN3_PIN, HIGH);
    digitalWrite(IN4_PIN, LOW);
  } else if (dirB < 0) {
    digitalWrite(IN3_PIN, LOW);
    digitalWrite(IN4_PIN, HIGH);
  } else {
    digitalWrite(IN3_PIN, LOW);
    digitalWrite(IN4_PIN, LOW);
  }
  analogWrite(ENB_PIN, speedB);
}

void setup() {
  Serial.begin(115200);
  pinMode(ENA_PIN, OUTPUT);
  pinMode(IN1_PIN, OUTPUT);
  pinMode(IN2_PIN, OUTPUT);
  pinMode(IN3_PIN, OUTPUT);
  pinMode(IN4_PIN, OUTPUT);
  pinMode(ENB_PIN, OUTPUT);
  Serial.println("L298N Motor Driver Initialized");
}

void loop() {
  // Drive forward
  Serial.println("Moving Forward");
  setMotors(200, 1, 200, 1);
  delay(2000);

  // Stop
  Serial.println("Stopping");
  setMotors(0, 0, 0, 0);
  delay(1000);

  // Drive backward
  Serial.println("Moving Backward");
  setMotors(200, -1, 200, -1);
  delay(2000);

  // Stop
  Serial.println("Stopping");
  setMotors(0, 0, 0, 0);
  delay(1000);

  // Speed ramp up
  Serial.println("Ramping Speed Forward");
  for (int spd = 0; spd <= 255; spd += 15) {
    setMotors(spd, 1, spd, 1);
    delay(100);
  }
  delay(500);
  setMotors(0, 0, 0, 0);
  delay(1500);
}Wiring diagram and example code generated by Codey.online — https://www.codey.online





 English
  Nederlands
  Frans
Frans  Deutsch
  Italiano
  Suomi
Suomi  Polski
  Dansk
Dansk  Ελληνικά
  Български
  Čeština
  Hrvatski
  Svenska
  Aileen