SKU: OT2085-B118 Número de artículo: NA171 EAN: 8126478667001

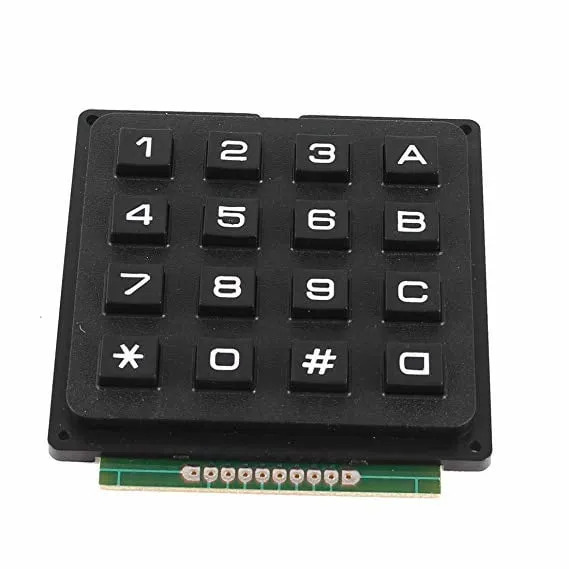
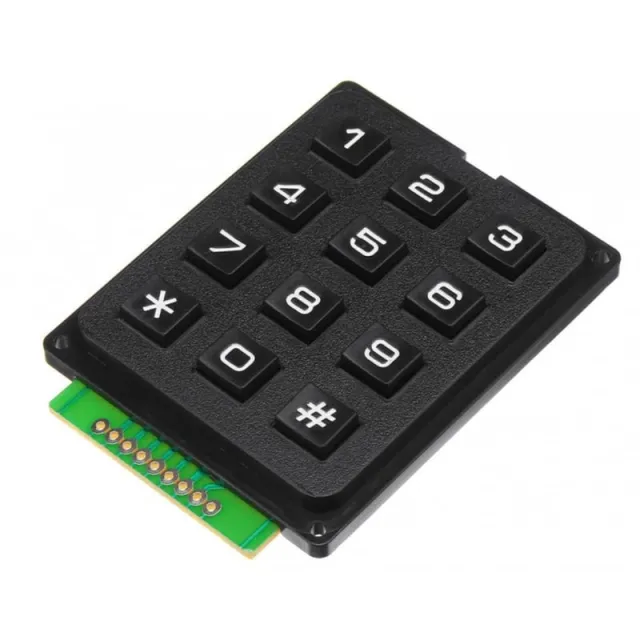
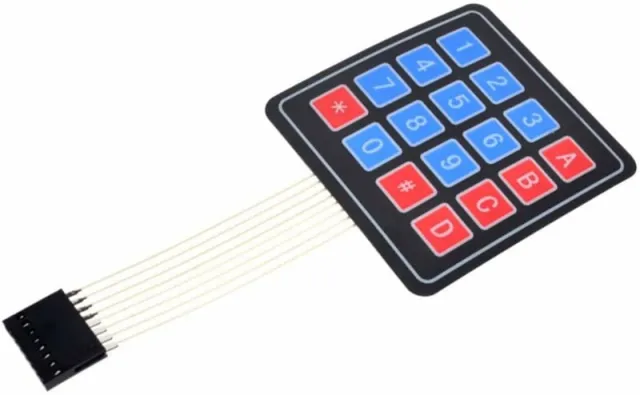
Teclado con teclas de plástico. Ideal, por ejemplo, para introducir un código de acceso.
El teclado tiene interruptores de membrana y todos los botones están numerados del 0 al 9, y los caracteres * y #. A la derecha hay 4 botones más con A,B,C y D
El módulo es muy adecuado para empotrar. El módulo también cuenta con cuatro orificios de 2mm para montaje.
Dimensiones
Longitud: 6,9cm
Anchura: 6,5cm
Altura: 1cm
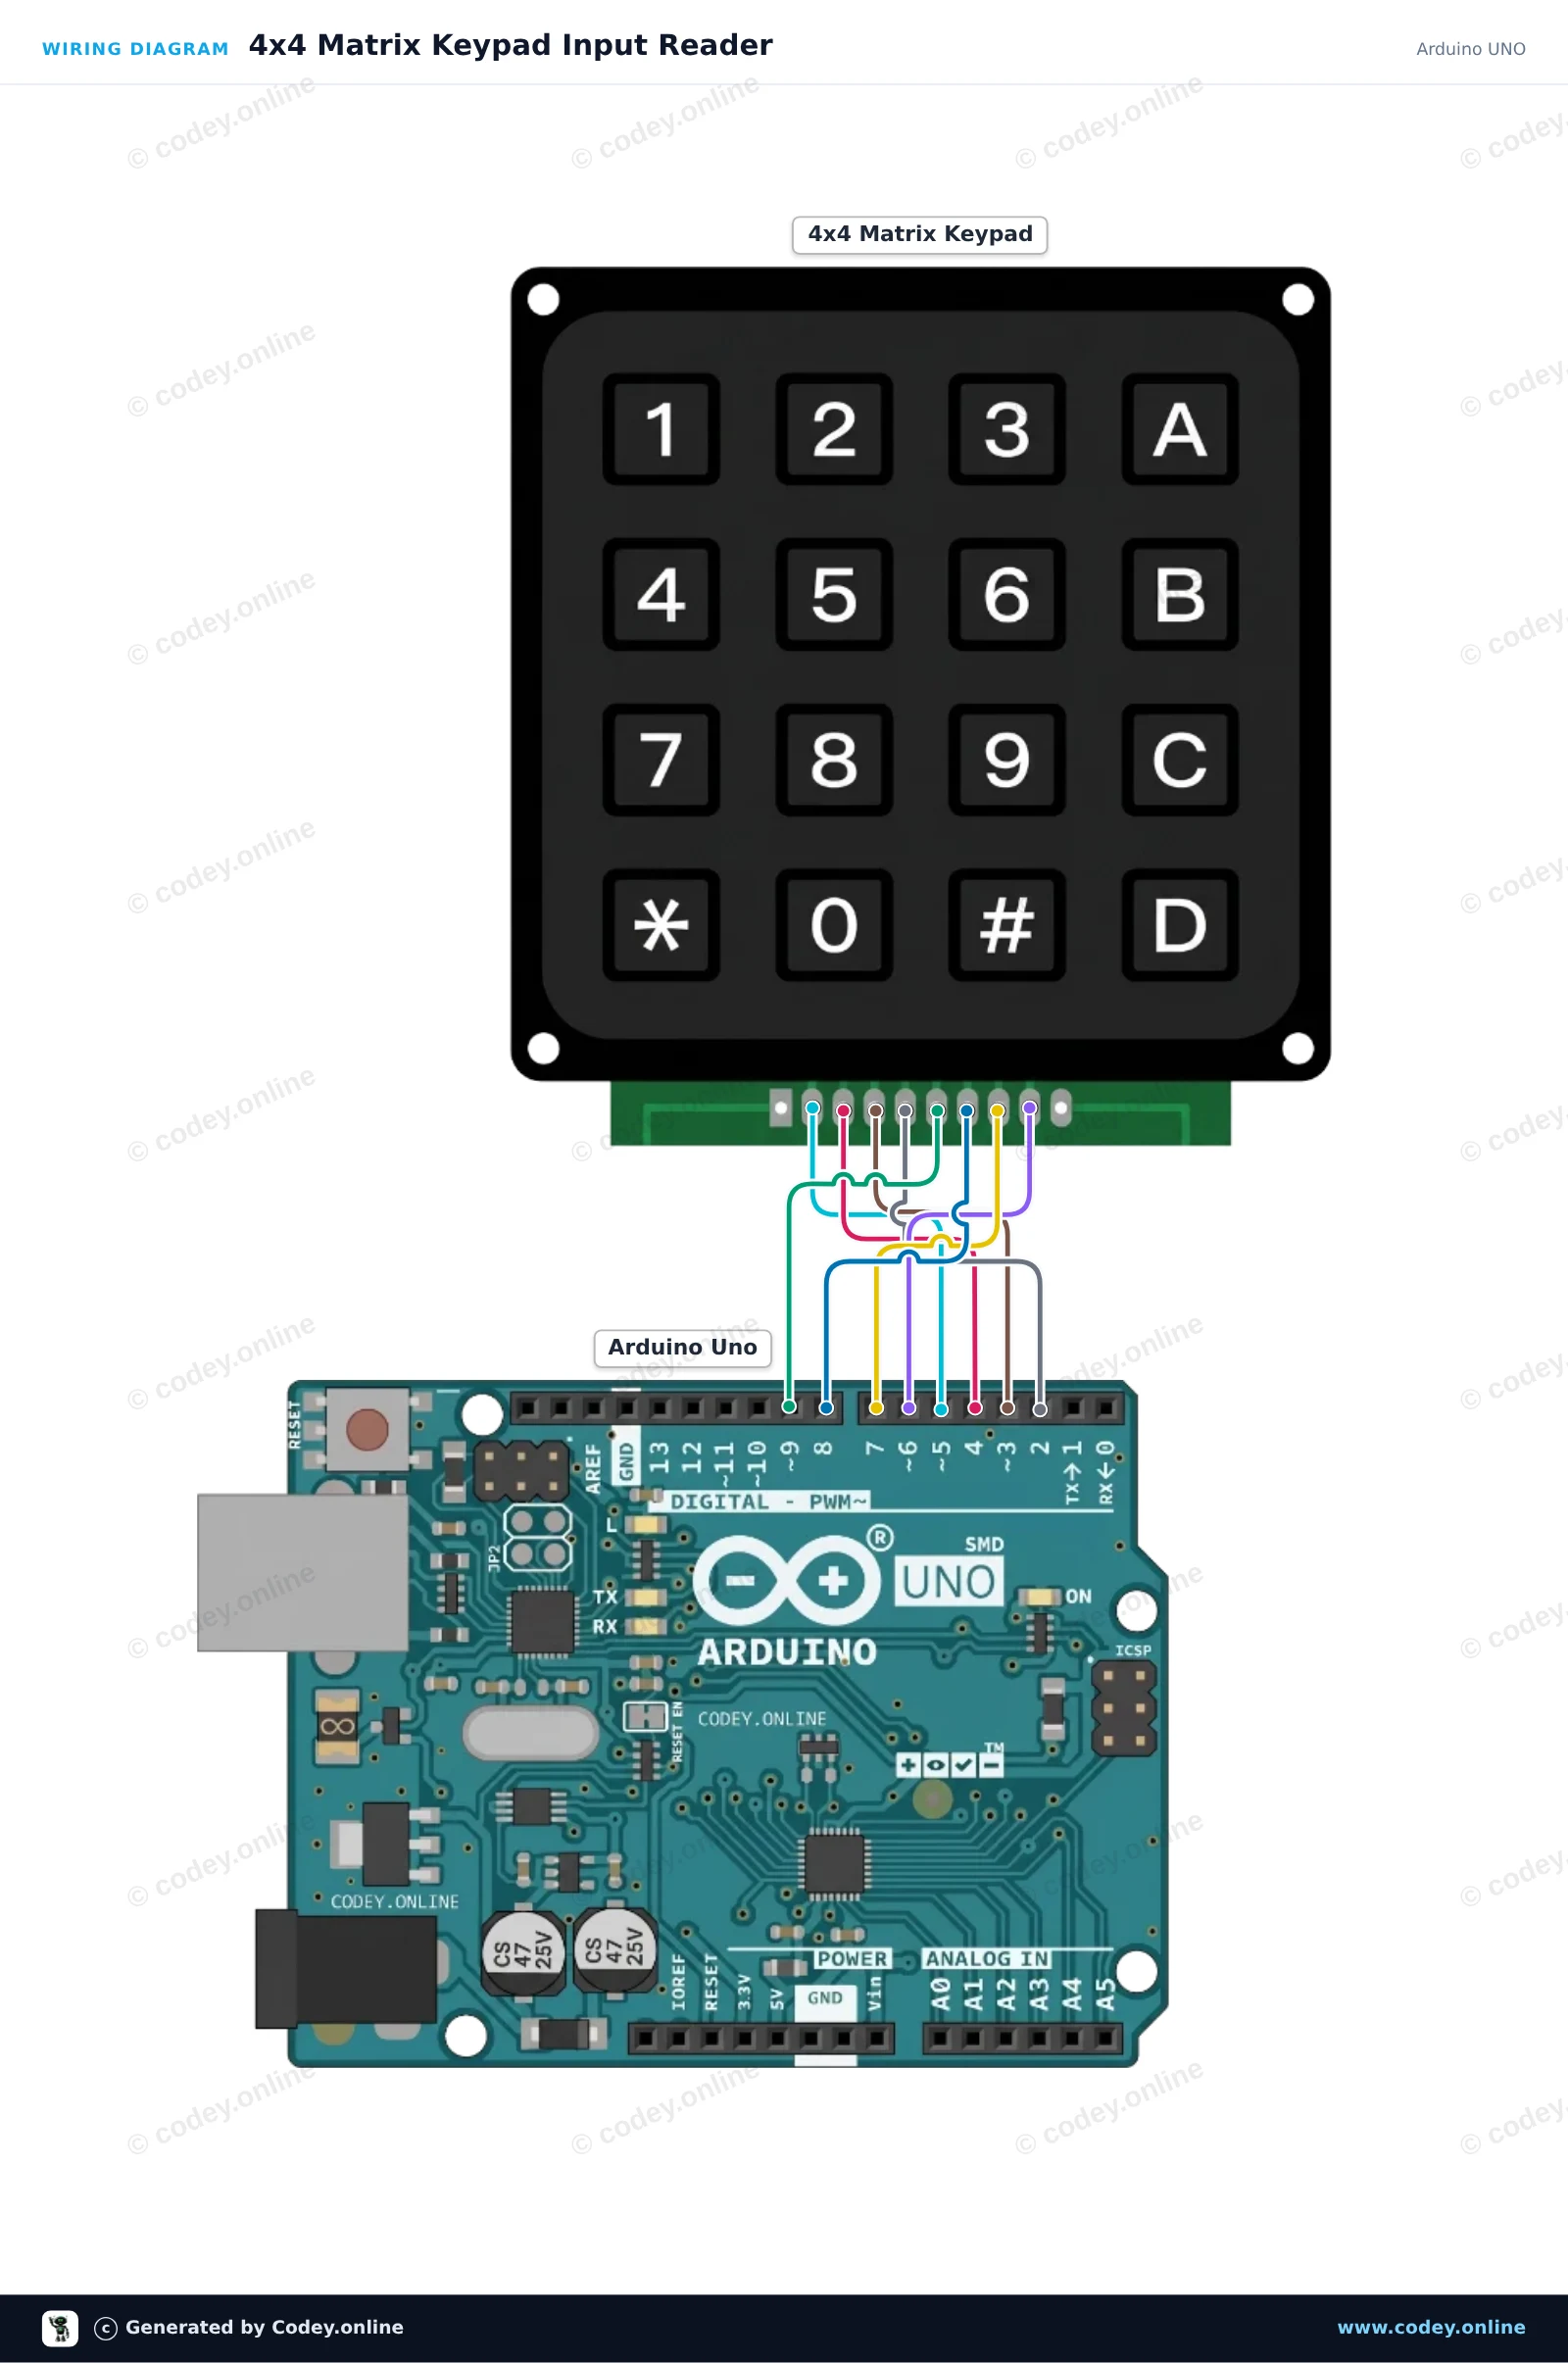
Así conectas el Teclado matricial 4x4 negro a un Arduino UNO o ESP32, con un sketch de ejemplo que puedes subir directamente.
Este proyecto demuestra cómo leer entradas de un teclado matricial 4x4 usando un Arduino Uno. Cuando se pulsa cualquier botón del teclado, el carácter correspondiente se imprime directamente en el Serial Monitor a 115200 baud.
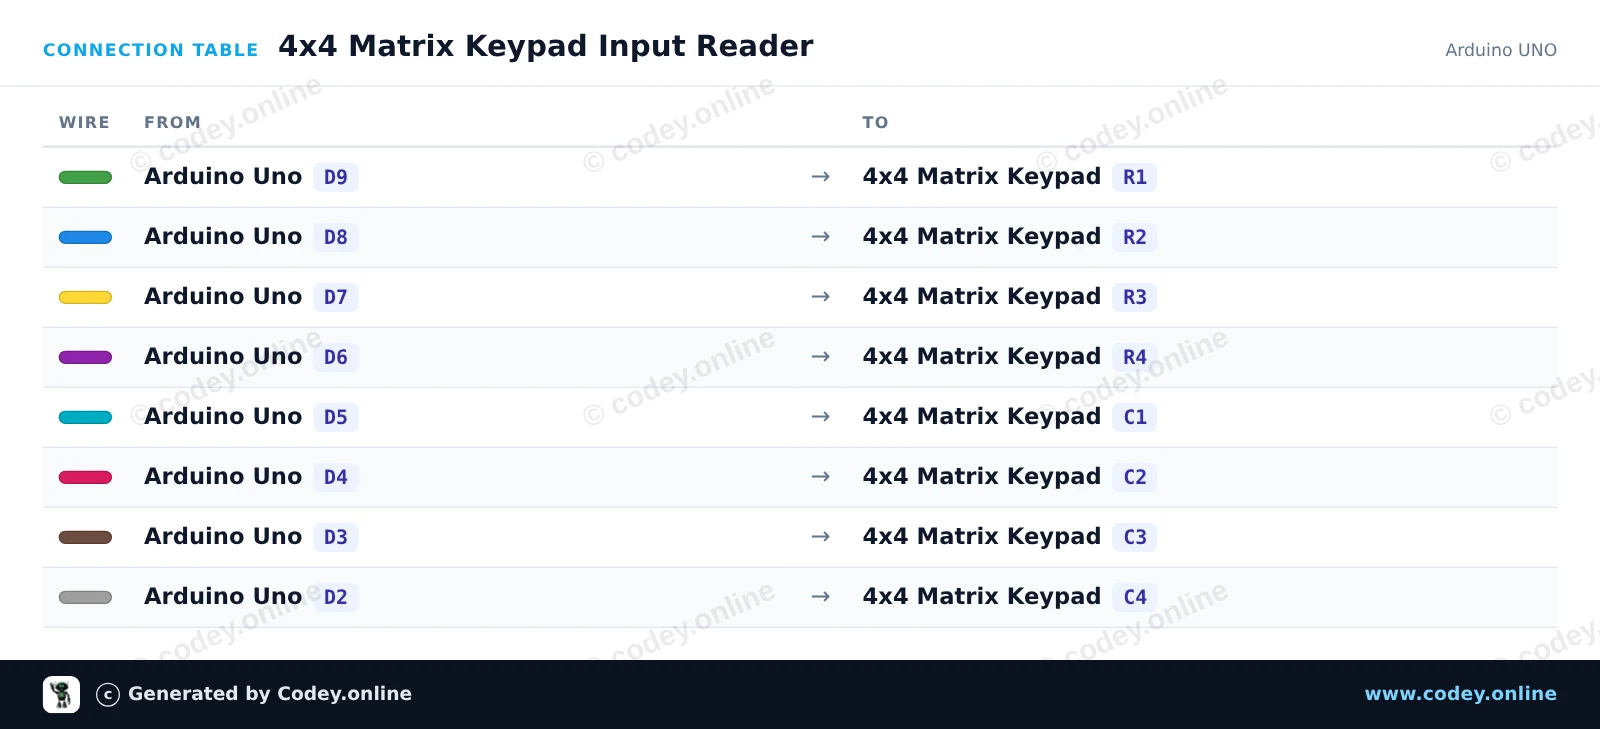
/*
 * ==================================================================
 *  Generated by Codey.online  —  https://www.codey.online
 * ==================================================================
 *  Project   : 4x4 Matrix Keypad Input Reader
 *  Board     : Arduino UNO (arduino:avr:uno)
 *  Parts     : Keypad 4x4
 *  Libraries : Keypad 3.1.1
 *
 *  Codey Online is an AI-powered browser IDE for Arduino and ESP32.
 *  Describe your project and Codey writes the code, draws the wiring
 *  diagram and uploads it to your board, straight from the browser.
 *  This code is free to use, modify and share, without warranty.
 * ==================================================================
 */

#include <Keypad.h>

const byte ROWS = 4;
const byte COLS = 4;

char keys[ROWS][COLS] = {
  {'1', '2', '3', 'A'},
  {'4', '5', '6', 'B'},
  {'7', '8', '9', 'C'},
  {'*', '0', '#', 'D'}
};

byte rowPins[ROWS] = {9, 8, 7, 6};
byte colPins[COLS] = {5, 4, 3, 2};

Keypad keypad = Keypad(makeKeymap(keys), rowPins, colPins, ROWS, COLS);

void setup() {
  Serial.begin(115200);
  Serial.println(F("4x4 Keypad Demo"));
  Serial.println(F("Press any key on the keypad..."));
}

void loop() {
  char key = keypad.getKey();

  if (key) {
    Serial.print(F("Key Pressed: "));
    Serial.println(key);
  }
}Bibliotecas necesarias: Keypad 3.1.1
Wiring diagram and example code generated by Codey.online — https://www.codey.online
Este circuito conecta un teclado matricial 4x4 directamente a los GPIO del ESP32. La Keypad library escanea las filas y columnas de la matriz usando resistencias pull-up internas. Al pulsar cualquier tecla, su carácter se muestra en tiempo real en el Serial Monitor.
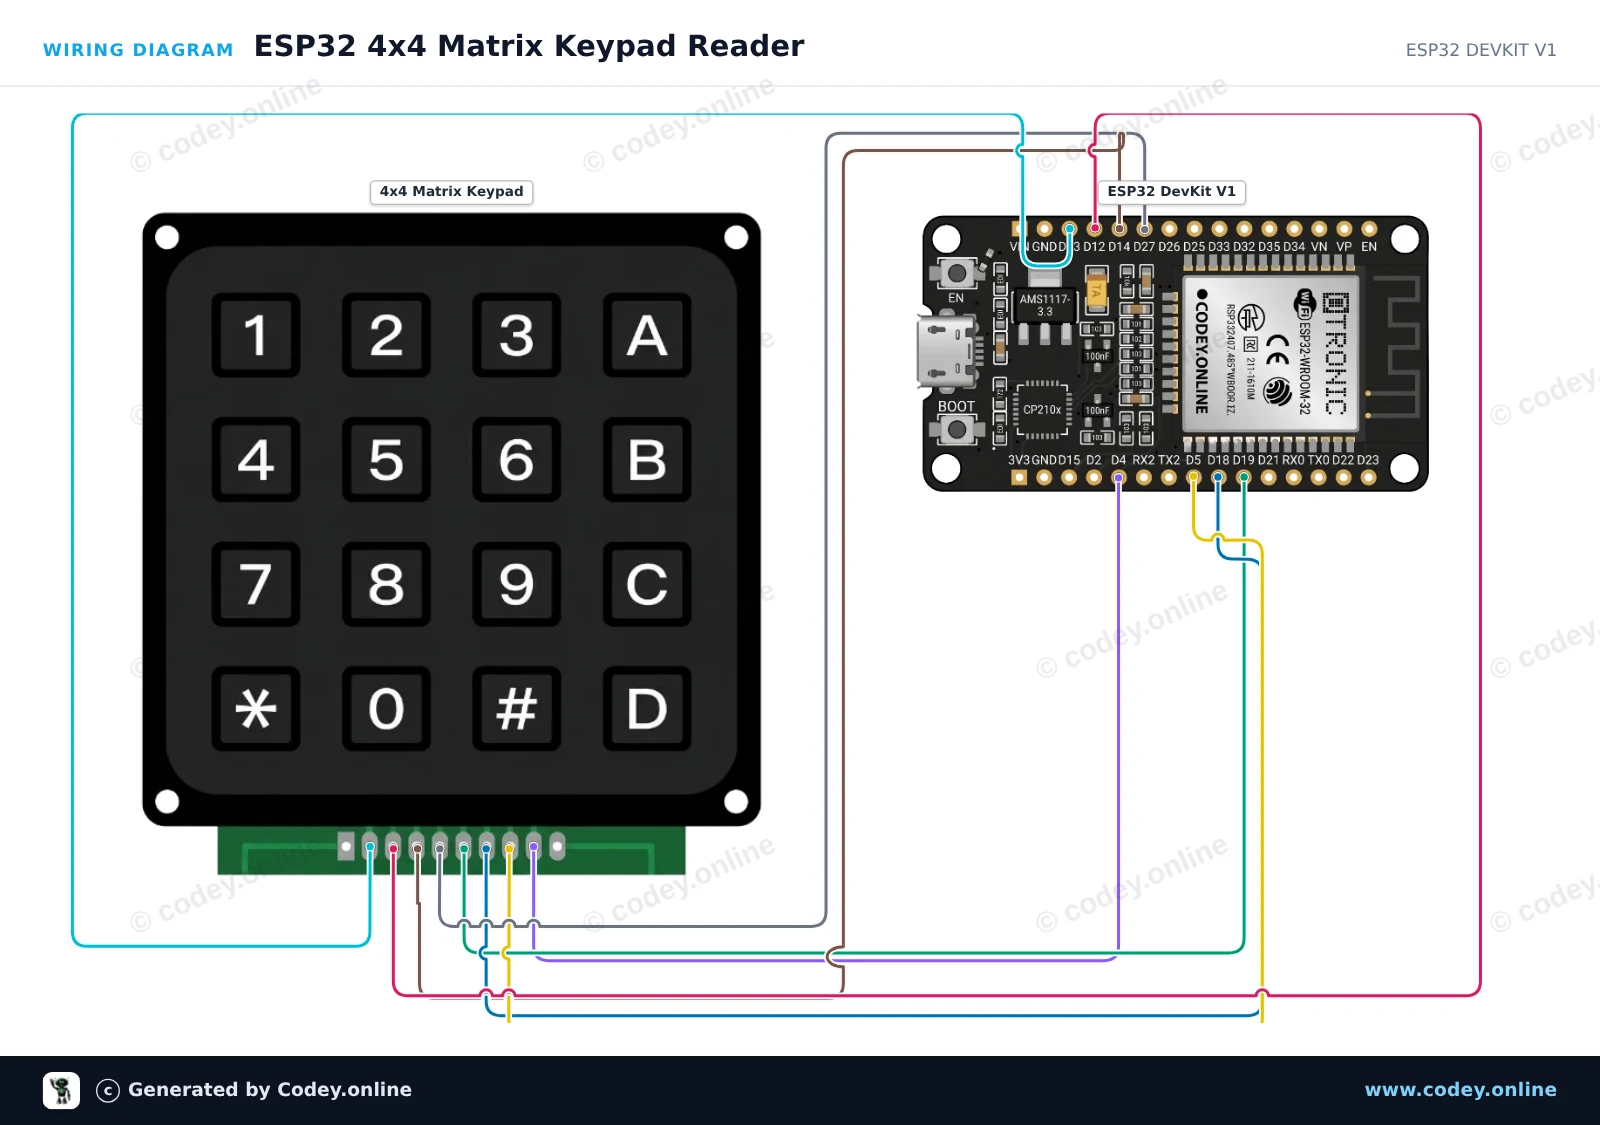
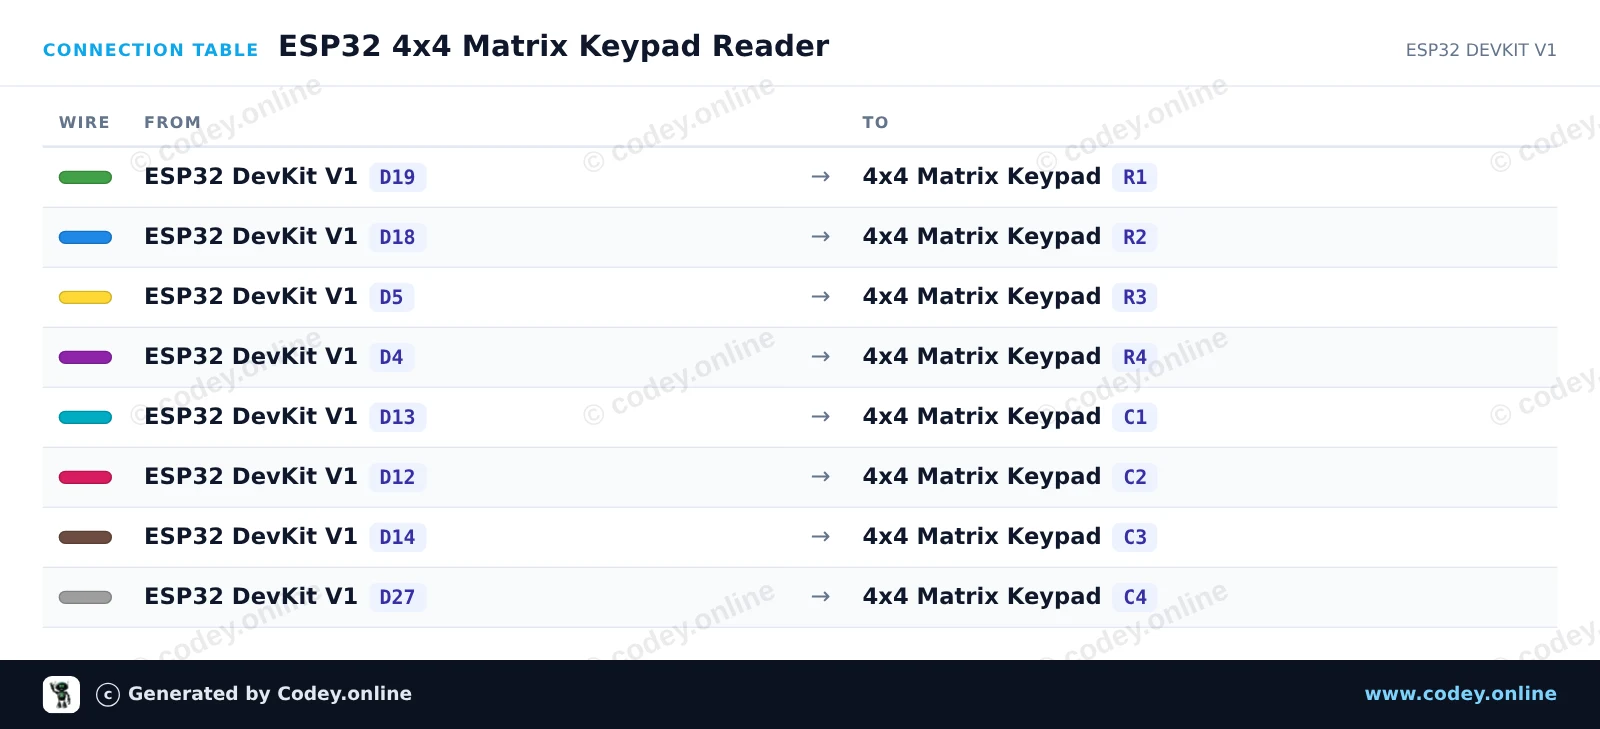
/*
 * ==================================================================
 *  Generated by Codey.online  —  https://www.codey.online
 * ==================================================================
 *  Project   : ESP32 4x4 Matrix Keypad Reader
 *  Board     : ESP32 DEVKIT V1 (esp32:esp32:esp32doit-devkit-v1)
 *  Parts     : Keypad 4x4
 *  Libraries : Keypad 3.1.1
 *
 *  Codey Online is an AI-powered browser IDE for Arduino and ESP32.
 *  Describe your project and Codey writes the code, draws the wiring
 *  diagram and uploads it to your board, straight from the browser.
 *  This code is free to use, modify and share, without warranty.
 * ==================================================================
 */

#include <Keypad.h>

const byte ROWS = 4;
const byte COLS = 4;

char keys[ROWS][COLS] = {
  {'1', '2', '3', 'A'},
  {'4', '5', '6', 'B'},
  {'7', '8', '9', 'C'},
  {'*', '0', '#', 'D'}
};

byte rowPins[ROWS] = {19, 18, 5, 4};
byte colPins[COLS] = {13, 12, 14, 27};

Keypad keypad = Keypad(makeKeymap(keys), rowPins, colPins, ROWS, COLS);

void setup() {
  Serial.begin(115200);
  Serial.println("4x4 Keypad Test Ready. Press any key...");
}

void loop() {
  char customKey = keypad.getKey();

  if (customKey) {
    Serial.print("Key pressed: ");
    Serial.println(customKey);
  }
}Bibliotecas necesarias: Keypad 3.1.1
Wiring diagram and example code generated by Codey.online — https://www.codey.online





 English
  Nederlands
  Frans
Frans  Deutsch
  Italiano
  Suomi
Suomi  Polski
  Dansk
Dansk  Ελληνικά
  Български
  Čeština
  Hrvatski
  Svenska
  Aileen